 Do you love going to the spa or the nail salon to get yourself pampered, but don’t feel like spending the time or money on a pedicure?
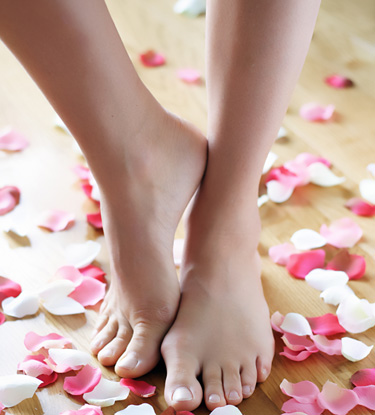
It’s sandal and flip-flop season, so make sure your toes are painted, feet are pampered, and you’re putting your prettiest feet in those new shoes. So, what are you waiting for? Get some friends together, open some wine, and host your own mini spa party!
Here are the steps to create the a perfect at-home pedicure:
1. Remove any old polish.
The first step to a great pedicure is removing any old polish you may have left on your toes. Use cotton pads or cotton balls with an alcohol-free or acetone-free polish remover. Removing old polish will give you a great fresh canvas for your next pedicure!
2. Cut your nails and file.
If your nails are long or jagged, give them a good cut and file before you soak them. Cut your nails straight across and not too close to the skin to avoid infection and prevent ingrown toenails from forming.
After trimming your nails, it’s time to file! Go for a traditional square shape by filing in one consistent direction. Use an emory board or a professional filing tool, but make sure you use a file that’s soft. You can finish the filing with a soft buffing to add extra shine and softness to your toenails.
3. Soak those feet!
Grab several large bowls—one for each of your guests—and fill them with warm or hot water. Include some yummy smelling bath salts, essential oils, salt, flowers, or any other spa essentials you love and dip your feet in! Leave your feet in the bowl for at least 10 minutes to ensure that your skin is soft, hydrated, and ready for scrubbing.
4. Give your cuticles some love.
Put some cuticle remover on your nails and rub it into your skin. After waiting 30 seconds to 1 minute, use an orangewood stick and push each cuticle down gently. You want your cuticles to meet the base of your nail. Don’t force them down! Use a soft circular motion and leave them alone after that.
5. Scrub, scrub, scrub.
Make sure your feet are smooth and silky before you move onto the rest of your pedicure. After your feet have soaked, take them out, dry them off, and start scrubbing them with a foot scrub, file, or pumice. Take away all of the dead skin that’s lingering on the balls of your feet, the bottoms of your feet, your heels, and on and between your toes.
It’s especially important to refrain from scrubbing your feet too hard! Once the dry skin layers are gone, your feet should be scrubbed enough. Often times, people scrub down to raw skin, exposing soft areas of the feet and exposing them to infection and irritation. Be gentle with your feet!
6. Moisturize!
It’s now time to moisturize your feet! Applying moisturizer will keep your feet hydrated, without cracks, and more beautiful longer. Find a scented foot moisturizer that’s soothing, relaxing, and tough enough to get into your skin. Massage the cream into not only your feet and toes, but also up onto your ankles and calves. Rubbing these areas will increase blood flow and circulation for healthier legs.
7. Time to polish.
Before you put polish on your toes, apply a thin layer of base coat. Remove any oils and moisturizers that may have lingered on your nails. Then, pick your favorite color for summer and apply! We recommend adding at least 2 coats of color to ensure that it looks bright and rich on your nails. If you mess up, use an orangewood stick to clean up any errors or smears.
Put on a layer of topcoat and let your nails set and dry. If you have an at-home nail dryer, set your feet under it so the thinners in your polish evaporate and the polish can harden and set. If not, make sure you air dry your nails in a cool, dry spot. If you’re in a humid place, the humidity will cause your polish to turn sticky and wet. After your nails have dried, finish them off with more moisturizer and finishing sprays.
Love giving yourself pedicures at home? Share your favorite nail tools, tricks, and tips with us below.