10 Breast Cancer Fundraising Ideas

<alt="fundraising"/>If you’re looking for a different approach to raising awareness for breast cancer, we’ve got you covered. The list of ideas below will help you get interested people to participate in a worthy and very important cause. Use these tips for yourself, or forward this list to your favorite business, colleagues, loved ones, and friends, and get them involved in the fight against breast cancer.


  1. Get active. You will see plenty of 5k runs and walkathons for breast cancer, but those are not the only physical activities you can participate in or host to support this cause. You can also swim, play tennis, or even golf for breast cancer. The more people who support breast cancer, the more money your community can raise for research.
  2.  Dress up. Get your office to wear pink for an entire week. Surely this will get the attention of clients, guests, and coworkers. It also gives a great chance for you to explain why’re everyone has pink clothes on, allowing you the perfect opportunity to ask for a donation. Make sure to post photos of your group on social media, in company emails, etc. to spread the word. Maybe your office isn’t onboard with this idea? Do this with a group of friends.
  3.  Check Meetup. Meetup is a website for people to form groups and participate in face-to-face activities. Check Meetup for breast cancer fundraising activities in your city, and get involved with your community.
  4.  Have a yard sale. Have a lot of stuff piling in your garage? With a yard sale, you can get rid of things you don’t need, make money, and forward all profits to a breast cancer organization of your choice. Plus, people are more likely to buy your stuff when you support a fantastic cause!
  5.  Create fliers. Fliers are great way to raise awareness. You can make thousands of them for just pennies, and you’ll reap the rewards in a big way. You can use fliers to show that your business or organization supports the fight against breast cancer, and you can promote upcoming awareness events, 5Ks, walks, and fundraisers.
  6.  Organize with your local Chamber of Commerce. Create partnerships with other local businesses and groups who support breast cancer. Doing so will broaden your message to a larger group of people. Referrals a great way to get people to donate.
  7.  Have a car wash. Get your neighborhood together and get the word out about a donation based car wash. Offer to wash cars for free and mention that you’re raising funds for breast cancer research. People will love the idea of having a clean car, and they’ll thank you for your commitment to raising awareness for breast cancer and donate to your cause.
  8.  Volunteer. You don’t have to start your own fundraising movement—there are many fundraising organizations out there who need help and lots of volunteers! This is something to keep in mind if you’re struggling to come up with an original breast cancer fundraising strategy, or you don’t have the time to create your own event.
  9.  Have a BBQ. Ask a local BBQ place to offer food at a significant discount in support of breast cancer. Tell them you will organize the event, and they just need to bring the grub! They’ll be able to support a good cause, you’ll raise money, and they now have new customers who have tasted their food. They get free marketing and PR for partnering with you at your event.
  10.  Create a trend. Surely you’ve seen the popular ice bucket challenge happening right now. The sensation has currently raised $44 million dollars for ALS! You can create a similar trend for breast cancer. If it catches on, you could be responsible for millions of dollars for breast cancer research!

The most important thing to keep in mind when starting a fundraiser is to take action. Someone has to get out there and get the ball rolling—it could be you.


Photo Credit: HowardLake

How to Get Ready for Your 5K Race Day

Untitled

5K races are a great way to raise money and support causes you care about, like breast cancer research. Not only do you help non-profits financially, but you benefit from participating in a healthy and fun exercise.

If you’ve ever done a 5K, you know preparation is key to making sure the race goes smoothly and successfully. If you haven’t done a 5K before and you’re training for your first race, read below to get some helpful tips to run your best on race day.

 Prepare for your run the day before.

Before going to bed, prepare your 5K outfit and have it ready to go when you wake up. The last thing you want to have happen when you’re ready to leave for your race is to lose your lucky socks or find out that your favorite sports bra is still in the washing machine. When you wake up in the morning, you’ll likely feel some anxiety about the upcoming race. This is normal. Preparing in advance keeps you on time, even in a state of panic. The less you have to worry about, the more relaxed you’ll be.

Eat a healthy, balanced dinner the night before. It’s best to prepare something you’re used to eating so you can ensure you won’t get sick and your body will react normally. Don’t get too adventurous before your race. Make sure you’re eating substantial complex carbs in your meal so you can be properly fueled up and ready to run the next morning.

Use appropriate racing gear.

Similar to how you shouldn’t eat new food before your race – don’t do anything else that takes you out of your regular running routine. This means you don’t want to wear new shoes, new clothes, or anything else you’re not used to wearing while running.

Why?

Because running a 5K is just as much a mental activity as it is a physical one. The more you change your behaviors, the more your body won’t recognize how to optimize your peak performance. Plus – when you wear new gear for your race, you put yourself at higher risk for injury, chafing, skin irritation, and more.

Imagine you’re a racecar driver who practices the same track, day after day. After a while, you know every inch of the track, and you perform much better on it than you would a brand new track. This is how your body works. The more familiar you are with it and how it reacts to gear and your regular routine, the better.

Arrive early!

Get to your race very early so you get a good parking spot and have plenty of time to warm up before the 5K. It’s better to leave yourself enough time to run a light run than it is to arrive without free time, so you end up stretching cold muscles. Give yourself some room to jog around a little, stretch your legs, grab a snack and water, and mentally prepare for the race.

When the race starts, it’s okay to be nervous. It’s a natural reaction you’ll probably have, especially if it’s your first one. You probably also aren’t used to running around so many people at the same time. Just remember: it’s all in your head. Running is a mental race. As long as you have a great experience and get a good workout in, that’s all that matters. Relax!

Pace yourself, and have fun!

It’s important to pace yourself throughout the run. Don’t worry about being first or letting your adrenaline take over. A 5K is about stamina. You may even want to think of the first 10-15 minutes of your 5K as a warm-up. It’ll help the race go by more quickly!

As you run, breathe from your inner stomach. Doing so allows you to have deeper breaths and sustained energy. It’s important to conserve your energy for the final mile, because that’s when you will get your second wind. The finish line is your goal. When you see it, keep your eyes on it and run like a cheetah!

5K runs are both fun and beneficial to your community. Be sure to replenish your workout with a healthy carb and protein-based meal, so you can stay healthy for your next 5K – and be sure to keep spreading the word about the 5K charity, foundation, or cause you supported.

Photo Credit: jacsonquerubin

Produce Tips to Save Money and Maximize Freshness

<alt="Peppers"/>You need fresh produce in your diet. Many of the vitamins, minerals, and phytochemicals keep your body healthy, growing, and healing. The vital nutrients in fruits and vegetables help you ward off heart disease, stroke, and even vision loss. A produce-rich diet also lowers blood pressure and cholesterol, and helps you maintain a healthy weight.

Eating produce is important. But what about buying it? How much do you know about what to buy and how to find the freshest of the fresh vegetables and fruits?

After reading this post, you’ll have a (lettuce) head’s up on produce shopping habits.

General Produce Buying

Stay clear of anything damaged or bruised; however, a small bruise or dent is okay. Fruits and vegetables are just like us — a little flaw here and there doesn’t mean we’re bad apples!

Another general tip is to choose items surrounded by or near ice if it’s freshly cut, such as half a watermelon or seasonal vegetables. The ice cold temperature maintains the freshness of the produce.

Another tip: bag your fruits and vegetables separately from meat, poultry, and seafood. These foods have different expiration dates and contaminants, and you don’t want them mixed up.

Lastly: buy fruits and vegetables when they’re in season so you can take advantage of lower prices. If you have access to a local farmers’ market, you should go! The foods are fresher and you’ll find more variations in what to buy.

5 Specific Produce Tips

Now, let’s get into some more specific tips for buying produce:

  • Apples: Fresh apples have firm skin. Test the firmness of the apple by balancing on the palm of your hand. The heavier it feels, the healthier the apple! If it feels soft and light, it’s not a good apple. Store your apples in a cool dark place or in a bag in your fridge.
  • Blueberries: Look for blueberries plump in size and color that have a firm look. If the blueberries look withered or dull colored, they are going bad. When storing blueberries, throw out the bad ones first. Store in your fridge and don’t wash them until it’s time to eat.
  • Broccoli: Good broccoli is dark green to almost blue in color on the flowers with small buds. Avoid limp broccoli with soft flowered ends. Keep broccoli in your fridge in a plastic bag, unwashed until it’s time to use it.
  • Carrots: Quality carrots are smooth and firm. Look for carrots straight in shape with no blemishes, too. The deeper the orange color, the better the carrots’ nutritional content. Store carrots in a plastic bag away from fruits. Remove the leafy top and loose dirt before storing.
  • Tomatoes: Like most fruits and vegetables, look for firm skin and little to no discoloration. Also look for slightly pink coloring. Tomatoes that are partially green will ripen if left out in the open for a day or two. Avoid soft tomatoes or tomatoes with wrinkled skin. Store in a cool place away from the sun. Store sliced tomatoes in the refrigerator.

Now that you’re a little savvier about buying fresh produce, here’s how to prepare your purchases:

Produce Preparation Tips

  1. Keep your vegetable bins as clean as possible. Fragments of old fruit or vegetables may attract germs and other unwanted bacteria.
  2. Rinse fruits and vegetables before eating, but not before storage.
  3. Do not use soaps, detergents or other cleaning solutions on your produce.
  4. Before washing or cutting produce, wash your hands and utensils with warm water.
  5. Use a vegetable brush under running water to clean tougher-skinned produce like potatoes, carrots, and melons.
  6. Wash large amounts of leafy greens by placing them in a water-filled sink. Let them fully soak and let the dirt and other sediments fall off. Then, drain the water and re-wash each leafy green again.
  7. Do not store bruised items. Instead, cut off the damaged area. If the area has spread to most of the fruit, discard it completely.
  8. Always dry your fruits and vegetables before storing. Damp, cool, and dark places are where bacteria thrive.

Got a produce tip to share? Leave it below!

Photo Credit: Martin LaBar

Protecting Your Skin in the Summer Sun

<alt="sunrise"/>Skin cancer is a major concern among adults every year. In 2013, there were over 82,000 cases of skin cancer in the United States alone. Additionally, last year there were roughly 12,600 skin cancer-related deaths.

Skin cancer can start from an irregularity in your skin and develop into something more serious. It’s possible to keep your skin safe from the sun. Before getting into those options, like sunscreen and protective clothing, here are some skin cancer warning signs to look for:

Warning Signs of Skin Problems

The best way to detect skin problems is to pay close attention to changes in your skin. Look out for things like growths or discoloration. If you notice a new lesion or a change in the shape, color, or size of a pre-existing mole or patch of skin, you should seek the consultation of a physician. Often times something very small can lead to something greater. Don’t take the risk. See a doctor when you notice changes on your body.

Non-Sunscreen Protection Options

When it comes to keeping your skin safe from the sun, you have more that a few options to consider.

1. Avoidance

The best skin protection is avoidance. Try to stay out of the sun as much as possible. Keep cool in the shade, and your skin will thank you for it. If you must be in the sun, wear tightly woven clothing and a wide brim hat to keep the sun off of your skin. When clothing like that isn’t a possibility, use plenty of sunscreen.

2. Sunglasses

Wear sunglasses to protect the sensitive skin around your eyes. Children in particular are susceptible to sun damage, so it’s highly recommended you keep their eyes protected, too.

3. Tanning Beds

Some people think tanning beds are safe because you’re away from the sun. The reality is: you should avoid anything related to a tanning bed or a heat lamp. These devices not only have the same harmful UV rays as the sun, tanning beds include additional harmful UV radiation.

4. Sunscreen

When choosing a sunscreen, you should always aim for an SPF of 30 or higher. Sunscreen will not fully protect you, so try to keep in the shade as much as possible.

Other factors make a difference in what sunscreen to choose. For example, babies and toddlers require different types of protection than an adult. Here are some sunscreen options out there to try:

Sunscreen for Momentary Sun Exposure

If you don’t plan on spending time in the sun for more than a few minutes, an SPF of 30 should be okay. We recommend applying lotions that have an SPF in them so that you’re always protected—even if you’re sitting in traffic in your car! The sun’s damaging rays are everywhere.

Broad Spectrum Protection

It’s very important that your sunscreen has both ultraviolet A (UVA) and ultraviolet B (UVB) protection. This allows protection from both sides of the light spectrum. If you plan to stay in the sun for long periods of time — such as the beach or near a pool — you should use an SPF of at least 30 or higher. With an SPF of 30, you filter out 97 percent of the sun’s UV radiation. You could also try an SPF of 50, which filters out up to 98 percent of these rays.

Sunscreen For Children

Chemicals are especially harmful for children’s skin, so you should avoid sunscreen with PABA and oxybenzone when using it on a child. Sunscreens with zinc oxide and titanium dioxide tend to be okay for people who have sensitive skin, so it’s okay if these ingredients are in your children’s sunscreen.

One more tip for sunscreen for children: try using alternative applications, like sprays, with colorful packaging that are “fun” to use. Why? Because — and parents already know this — getting sunscreen on children can be a challenge. When using sprays, don’t spray on their faces. Instead, spray on the hands and spread on their faces.

Sunscreen For Sensitive Skin

If you have to manage allergic reactions, acne, or rosacea-prone skin, avoid sunscreens containing:

  • Preservatives
  • Fragrances
  • PABA
  • Oxybenzone
  • Anything “greasy” in substance

Sunscreen For Dry Skin

People with dry skin will find great benefit from moisturizing sunscreens. Apply after showering to “lock in” the moisture to your skin, and be sure to re-apply every 30 minutes.

Have a favorite sunscreen you use daily? Share it in the comments below!

Photo Credit: Werner Kunz

Refreshing Summertime Drinks

<alt="Raspberry Lemonade"/>Are you hosting a BBQ this summer for your friends and family? Maybe you’re planning a great summer supper with all of your favorite seasonal ingredients. If you’re like us, we love hosting get-togethers and fun parties for our loved ones in the summer. You enjoy planning the event, picking out the right dishes to serve, and creating signature drinks for your guests to enjoy.

For a refreshing alternative to cocktails and punches, how about offering some delicious fruit waters to your guests? These waters are not only great for staying hydrated in the sun, but they’re also great for those guests who may not drink alcoholic beverages or want a “lighter” libation alternative.

Here are some great fruit waters to make and serve at your next summer party:

Cinnamon Apple Water

For a great water that both adults and kids alike will enjoy, mix up a pitcher of cinnamon apple water. Cut up your favorite apple—or add a few different varieties—and sitr in some fresh cinnamon and cinnamon sticks, place your water pitcher in the fridge for a few hours, and you’re all set! This water is perfect for sipping at parties, as well as when you’re lounging by the pool or sitting on the beach. You’ll stay hydrated, fuller longer, and cleansed of harmful toxins.

Cucumber, Ginger, and Lemon Delight

Cut up some cucumber, wedge lemons, slice up fresh ginger, and add all of your ingredients to a large pitcher of ice water. The cucumber and citrus not only give this fruit water a great flavor, but these ingredients also have detox properties that cleanse the body of toxins, stimulates fat burn, and boosts your metabolism.

Watermelon Refresher

Who doesn’t love biting into a juicy watermelon when it’s hot and sunny outside? This watermelon drink is suitable as an everyday treat, or a crowd pleaser at your next outdoor dinner. Slice up and muddle some watermelon—and remember to take out the seeds first! You can even create watermelon or mint ice cubes to include in your pitchers for a tasty and visually stunning surprise. Watermelon keeps your liver and kidneys clean and healthy, making this fruit water one of the best choices to include on your beverage table.

Triple Berry Threat

This one is a true favorite of ours. If you’re hosting a party, a bridal shower, a dinner with friends, or even your kids’ birthday parties this summer, try making this tasty fruit water. Slice up some local strawberries, pop in some fresh blueberries, and add in ripe raspberries to a pitcher of cold water. Add berry or mint ice cubes to the water, and voila: an instant hit. Hosting a party? Berries are known for their cancer- and age-fighting properties, so you’ll help stave off cancer and keep your skin beautiful and clean this summer!

Have a favorite fruit water recipe you love? Share the recipe with us below.

DYI Facial Masks

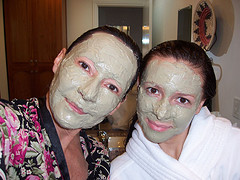
<alt="home Facials"/>Keeping your skin healthy, hydrated, and clean is your top priority. It’s imperative that you maintain great skin care—especially on your face—to keep your skin looking younger, brighten your complexion, and regularly hydrate your pores to prevent adult acne, blemishes, and skin discoloration.

There are countless facial cleansers, scrubs, and masks on the market, but many are filled with harmful chemicals and unnatural ingredients. We suggest creating your own at-home facial mask to ensure that you’re putting only the very best mixture on your precious skin!

At your next “girls’ night,” mani-pedi day, or personal relaxation time, try mixing together one of these DIY facial masks for a fresh, clean, and bright face:

Olive Oil Facial Cleanser

Combine 2 teaspoons of high quality olive oil, half a teaspoon of lemon oil (NOT lemon juice), and 2 tablespoons of Greek yogurt. Rub the mixture into your skin and leave it on your face and neck for a few minutes. Try not to leave it on for too long! Wipe the mask away with a warm washcloth. You can use this mask every day, and we recommend using it as soon as you wake up in the morning. Your skin will be refreshed and softer than you could imagine! Remember to use very high quality olive oil and lemon oil. This mask combats acne and moisturizes dry skin.

Teatime Toner

It’s important to use toner on your skin, especially on the delicate skin around your eyes. This toner treatment is designed to reduce swelling, relax your face, and bring energy and revitalization back into your skin. To create this “Teatime Toner,” choose a high quality green tea and brew a cup. Let the tea sit out and cool (DON’T put ice cubes in this, or it will dilute the solution). Take a round makeup sponge and soak it in the tea. Gently squeeze out the excess and place the makeup sponges directly on your eyelids, or around that area. Keep these sponges on your face for 15-20 minutes before bed, and you’ll notice tighter skin and cleaner pores in no time. Forget the alcohol-based toners. This one is skin-friendly and smells great, too!

The Dry Skin Solution

In a bowl, mix together 2 tablespoons of honey with 1 tablespoon of apple cider vinegar or lemon juice. Add this sticky mixture to a cleaned, washed face for 20 minutes or more, and then gently remove the mask from your skin with cold water. Use this mask when you’ve spent the day at the beach, outside, or after a workout. Your skin will be refreshed, moisturized, and healed.

Oatmeal Scrub

For a great at-home skin exfoliator, try this facial scrub: combine 1 teaspoon honey and 1 teaspoon olive oil in a bowl. Take a packet of plain oatmeal (just the original kind—no flavor), use slightly less water than the packet calls for, and cook it. Mix this together and ensure you’ve created a sticky paste. After the oatmeal cools, add the honey-oil mixture to it. Take the oatmeal mask in your fingers and apply small amounts to your skin, and anywhere on your body you may need to exfoliate. You’ll end up with beautiful, soft skin!

Photo Credit: Neeta Lind

Do you make your own facial masks? Share your favorite recipes and combinations with us below.

Summertime Treats for Better Health

<" alt="cherries" />Summertime means sunshine, picnics, and an abundance of seasonal foods like the ones we feature below.

You might commonly associate the word treat with candy, ice cream, or pastries. While those are treats, they’re not the only kind of treats out there. The dictionary definition of the word treat means “something that gives great pleasure.” A strawberry pie may taste good, but fresh and juicy strawberries taste good AND are healthy…two treats in one!

Here are some of our favorite healthy summertime treats to enjoy this summer:

Corn

Fresh and sweet corn is a staple summer treat. Corn also has way of providing you protection from the sun. Thanks to two antioxidants in corn—lutein and zeaxanthin—eating corn assists in the formation of macular pigment filters. Additionally, corn helps combat age-related macular degeneration: the leading symptom responsible for blindness in people over the age of 60.

Tart Cherries

Drinking cherry juice is a common way to get better sleep and combat workout fatigue. But juice isn’t the only way to get the benefits of cherries: you get a full spectrum of health benefits from eating them whole. (Minus the pits, of course.)

Researchers found tart cherries provide weight management benefits. The test subjects in the study that ate cherry powder did not gain as much weight or belly fat as those who did not. Additionally, cherry eaters had lower cholesterol and triglyceride levels.

Tomatoes

Fighting the burning sun requires sunscreen. Layering on a protective lotion or oil keeps you safe from UV rays. The next time you consider what sunscreen to put on, consider what you can put in your body to protect yourself, too! Nature provides a wide assortment of natural sun blocking foods, one of them being the tomato.

Eating tomatoes obviously should not replace wearing sunscreen to protect your skin, but consuming them does provide a much-needed extra boost of natural protection, thanks to their high lycopene content.

Iced Tea

When the sun is beaming, there’s nothing better than an ice-cold drink. Instead of reaching for a sugary juice, satisfy your thirst with some iced tea instead. It provides the same treat-like satisfaction and has way more benefits than processed drinks.

Tea contains antioxidants called flavonoids, which lower the risk of Alzheimers and diabetes, and provide healthier teeth, gums, and bones.

It doesn’t matter what variety you choose to drink—black, oolong, green, or herbal—because all tea contains flavonoids. To preserve the flavonoids in the tea, squeeze a lemon inside the pitcher before storing it in your fridge. The citric acid and vitamin C in the lemon (or lime or orange, if you prefer) will work its magic on its own.

Watermelon

There’s no doubt the best thing you can do during summer is drink plenty of water. Staying hydrated keeps your body from overheating. Thanks to watermelon, you get both the benefit of hydration (because watermelon is 92 percent water) and skin-protection (thanks to lycopene).

Additionally, eating foods full of water, like watermelon or kale, keeps you satisfied on fewer calories. Out of all of the treats shared here, watermelon is our favorite and most nutritious choice.

Do you have a favorite treat to eat in the summertime? Please let us know and share it in a comment below!

Photo Credit: motumboe

How to Unwind After Work

<img src="image.gif" alt="A bench in a park" />

Is it just us, or does time seem to slow down toward the end of the workday?

Don’t get us wrong – we’re passionate about what we do! But even if you enjoy your career or business very deeply, unwinding is important for your health. In fact, taking time off leads to even greater productivity and increased happiness.

Shutting down your workday means not opening any work until tomorrow! Even if you have several more things to do in the evening (we know what it’s like to be a woman with a lot responsibility!), you must make time to unwind. Just one hour of “me time” can make a day’s worth of difference.

One hour is recommended, but even if you spend fifteen minutes by yourself, you’ll get the benefits of ridding stress and tension. Here’s how:

Unwind by Napping

Being well-rested is key to regenerating your energy for the following day. A small nap in the evening provides the perfect transformation from “work mode” to “home mode.”

According to the National Sleep Foundation, there are three different ways to nap.

1. Planned napping. This is when you nap before you’re sleeping. It’s like keeping your gas tank half full instead of full or empty.
2. Emergency napping. If you feel extremely fatigued after work, then you need this kind of nap. Don’t try to fight drowsiness. Nothing is more important than your health.
3. Habitual napping. These are scheduled naps you take daily. When you know in advance what your evening looks like, you can take planned naps.

Of these three, habitual napping is the best way to unwind. Why? Because when your body is used to always resting at a certain time, it will provide you a deeper period of sleep.

Get Physical

Are you having trouble sleeping at night? Try doing 15-30 minutes of exercise in the evening. Even if your mind is racing, having a tired body will kindly force you to rest. It’s a win-win, because you’ll wake up feeling healthier and rested (aside from the sore muscles).

Working out to unwind may seem contradictory. Just keep in mind how your post-workout euphoria will put you at ease.

Make New Friends

Sites like meetup.com provide a place for you to go and make new friends. Perhaps you have a hobby like painting or hiking. With Meetup, you can schedule regular gatherings in the evening.

Many people share the desire to unwind after work. Mingling with like-minded people may be that helpful boost in energy you’ve been looking for!

Social Media Time

You don’t have to leave home to catch up with friends. Sites like facebook.com are a way to see what everyone is up to. Instead of using Facebook throughout the day, try Facebooking on a schedule (as weird as it sounds, this is a healthier way to use social media):

Schedule a time to use Facebook (e.g., 6:00-6:30 P.M).

Post something positive, leave positive comments on your friend’s posts, and share things you like on your wall.
At 6:30, shut down Facebook. Don’t let it suck you in — it will still be there tomorrow.

These are just a few ways to unwind after work. Do you have a favorite way? Please let us know by sharing it in a comment below!

Photo Credit: alexcoitus

Simple Ways to Make Yourself Happier

<img src="image.gif" alt="A branch" />Remember being a kid and your biggest chore was eating all of your dinner?

What a “problem” to have!

When it comes to living happier, you could learn a lot from a children. In fact, children laugh an average of 300 times a day while adults only laugh around 20 times.

It’s easy to forget to live a happy life as you get older. Bills, careers, stress, relationships, and countless other adult activities can burden your day-to-day routine. If you don’t remember to be happy, you’ll walk around with a frown, as if there’s a permanent rain cloud above your head.

But there’s a bright side to being an adult: you have more control over your life than you did as a child. While you have more responsibilities than a child, you don’t need anyone’s permission to do exactly what you want. Making a change for the better is simply a matter of wanting to do it.

So, give yourself permission to be happy. Here are a handful of ways to get happy:

Do Nice Things for Others

Giving to others is just as nice as receiving. For some people, giving is actually more beneficial. Think about the last time you received a random gift. Remember how happy it made you feel? Re-create that experience for someone else. When you see her face light up, you’ll feel happy you’ve made someone else happy—for no particular reason at all! Spreading happiness works like spreading the flu, except with less coughing.

You don’t need to buy your friend a new car to make her happy (although if you did, we’re sure she’d be ecstatic). A simple cup of coffee does the trick.

It doesn’t even have to be a friend, either. Why not buy something nice and give it away to a stranger? Even better: do something nice for someone without them knowing it was you. Doing this removes them feeling the need to reciprocate, too. You still get the good feeling of being helpful and they don’t have the pressure of paying you back.

Learn a New Skill

You can do anything you want. Yes, anything! All it takes is the desire to do so and a little effort. Taking on a new hobby and seeing your newfound skill develop over time will make you happy!

If you ever wanted to play the piano, do it! No one is stopping you. Start today, and in six months you’ll be amazed at your progress.

You could even take a class completely unrelated to anything you do or thought you’d be interested in. Imagine the surprise of your friends and family when you take up karate or archery. Not only will they be impressed by how outgoing you’ve become, but they’ll be inspired to pursue new skills, too!

The takeaway for learning a new skill is to break the mold of regularity. You don’t have to dye your hair pink and buy an entire new closet of clothes. Simply start making small adjustments by learning something new, and happiness will flow through you.

Handwrite a Letter to Someone

Can you recall the last time someone wrote a letter to you? Perhaps it was a card for an event, like a birthday or a wedding invitation. There’s something magical about receiving a handwritten letter. Not only is it more exciting to open than a bill, handwritten letters make you feel special. Getting a handwritten letter means someone took the time to write to you!

Think of someone who brings happiness in your life. Maybe it’s a family member, or perhaps it’s a friend. It could be someone you’ve never met, like a book author or a celebrity. Regardless of who it is, spend a solid hour writing them a letter expressing how good they make you feel. When you’re done: fold, stamp, and send. Oh, and don’t forget to smile, too.

You never know what can come from sending a letter. One couple sent a wedding invite to the Queen of England on a whim. And guess what? The Queen showed up!  It just so happened the Queen of England was in the area that day and didn’t have any other plans. Just a simple letter made that couple’s day much happier.

They didn’t ask for permission — they simply took the action.

Remember: you have the freedom to go out and create a happier life for yourself. No one is stopping you. You can start to be happy right now by just putting a smile on your face.

Share your favorite ways to make yourself happy below!

Photo Credit: Denis Collette https://www.flickr.com/photos/62202285@N00/2206463202

Mini Spa Date: Pedicures 101

pedicurehomeDo you love going to the spa or the nail salon to get yourself pampered, but don’t feel like spending the time or money on a pedicure?

It’s sandal and flip-flop season, so make sure your toes are painted, feet are pampered, and you’re putting your prettiest feet in those new shoes. So, what are you waiting for? Get some friends together, open some wine, and host your own mini spa party!

Here are the steps to create the a perfect at-home pedicure:

1. Remove any old polish.

The first step to a great pedicure is removing any old polish you may have left on your toes. Use cotton pads or cotton balls with an alcohol-free or acetone-free polish remover. Removing old polish will give you a great fresh canvas for your next pedicure!

2. Cut your nails and file.

If your nails are long or jagged, give them a good cut and file before you soak them. Cut your nails straight across and not too close to the skin to avoid infection and prevent ingrown toenails from forming.

After trimming your nails, it’s time to file! Go for a traditional square shape by filing in one consistent direction. Use an emory board or a professional filing tool, but make sure you use a file that’s soft. You can finish the filing with a soft buffing to add extra shine and softness to your toenails.

3. Soak those feet!

Grab several large bowls—one for each of your guests—and fill them with warm or hot water. Include some yummy smelling bath salts, essential oils, salt, flowers, or any other spa essentials you love and dip your feet in! Leave your feet in the bowl for at least 10 minutes to ensure that your skin is soft, hydrated, and ready for scrubbing.

4. Give your cuticles some love.

Put some cuticle remover on your nails and rub it into your skin. After waiting 30 seconds to 1 minute, use an orangewood stick and push each cuticle down gently. You want your cuticles to meet the base of your nail. Don’t force them down! Use a soft circular motion and leave them alone after that.

5. Scrub, scrub, scrub.

Make sure your feet are smooth and silky before you move onto the rest of your pedicure. After your feet have soaked, take them out, dry them off, and start scrubbing them with a foot scrub, file, or pumice. Take away all of the dead skin that’s lingering on the balls of your feet, the bottoms of your feet, your heels, and on and between your toes.

It’s especially important to refrain from scrubbing your feet too hard! Once the dry skin layers are gone, your feet should be scrubbed enough. Often times, people scrub down to raw skin, exposing soft areas of the feet and exposing them to infection and irritation. Be gentle with your feet!

6. Moisturize!

It’s now time to moisturize your feet! Applying moisturizer will keep your feet hydrated, without cracks, and more beautiful longer. Find a scented foot moisturizer that’s soothing, relaxing, and tough enough to get into your skin. Massage the cream into not only your feet and toes, but also up onto your ankles and calves. Rubbing these areas will increase blood flow and circulation for healthier legs.

7. Time to polish.

Before you put polish on your toes, apply a thin layer of base coat. Remove any oils and moisturizers that may have lingered on your nails. Then, pick your favorite color for summer and apply! We recommend adding at least 2 coats of color to ensure that it looks bright and rich on your nails. If you mess up, use an orangewood stick to clean up any errors or smears.

Put on a layer of topcoat and let your nails set and dry. If you have an at-home nail dryer, set your feet under it so the thinners in your polish evaporate and the polish can harden and set. If not, make sure you air dry your nails in a cool, dry spot. If you’re in a humid place, the humidity will cause your polish to turn sticky and wet. After your nails have dried, finish them off with more moisturizer and finishing sprays.

Love giving yourself pedicures at home? Share your favorite nail tools, tricks, and tips with us below.