5 Homemade Delicious and Nutritious Popsicle Recipes

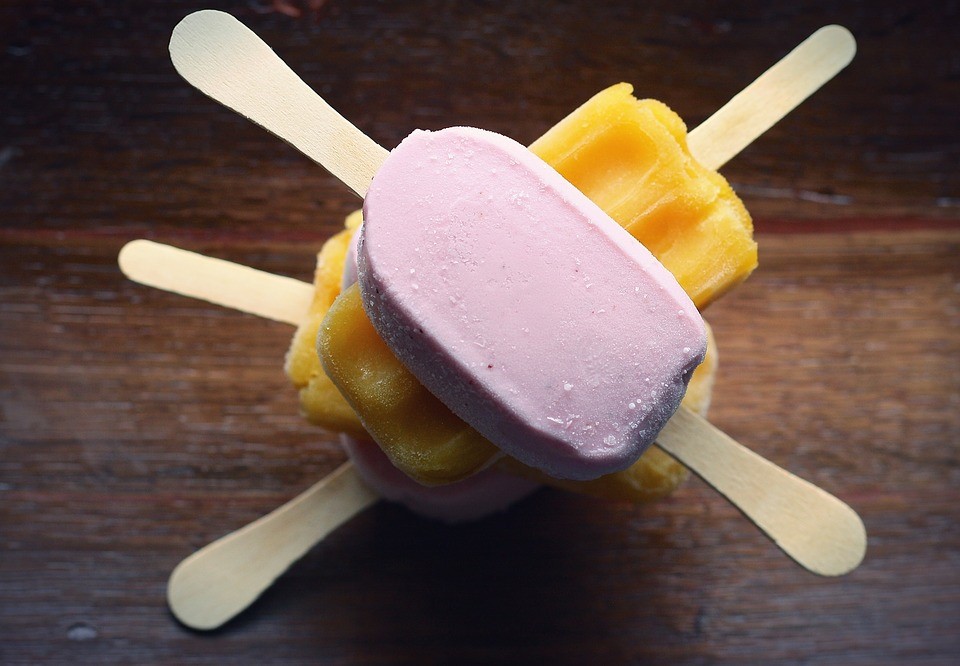
There’s nothing better than a frosty sweet treat after a long day of playing or working in the hot sun. Unfortunately, a lot of us end up reaching into our freezers only to grab popsicles filled with sugars and preservatives.

Now that doesn’t sound refreshing or appetizing!

While there’s nothing wrong with eating a store-bought popsicle from time to time, we figured you might like the option to make your own popsicles, made with fresh fruit and natural ingredients.

Here are a few of our favorite delicious and nutritious popsicle recipes. Give them all a try!

Strawberry Buttermilk Pops

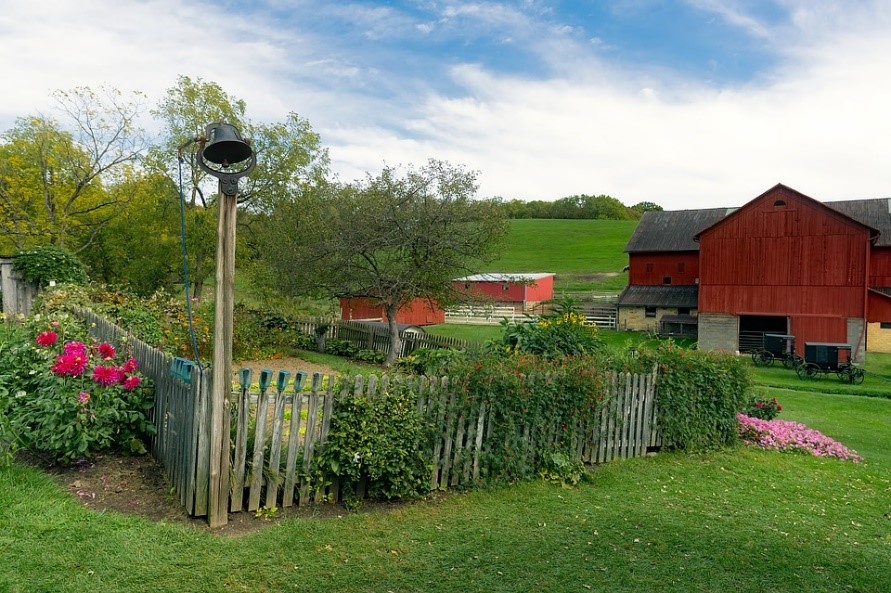
It’s the perfect season for fresh strawberries. Visit a local berry-picking farm and grab a bushel of berries for this delicious strawberry buttermilk popsicle recipe.

Ingredients:

  • 1 pound strawberries, hulled
  • 1 cup buttermilk
  • 1 cup plain Greek yogurt
  • 1/2 cup honey
  • 1/4 cup sugar
  • Pinch of salt

Directions:

  1. Puree the strawberries, buttermilk, yogurt, honey, sugar, and salt in a blender until smooth.
  2. Pour the mixture into 8 4-ounce ice-pop molds, dividing evenly. Insert ice-pop sticks and freeze until firm, at least 4 hours and up to 4 days.

Recipe Source: https://www.realsimple.com/food-recipes/browse-all-recipes/strawberry-buttermilk-pops

Cucumber, Agave, Mint Pops

Looking for a guilt-free desert to try? This recipe is it! Made with cucumbers and mint leaves—plants you can grow in your own summer garden—this refreshing pop is as nutritious as it is delicious.

Ingredients:

  • 2 large English cucumbers, chopped
  • 1 cup fresh mint leaves
  • 1 cup fresh lime juice
  • 3/4 cup agave nectar
  • Pinch of salt

Directions:

  1. Puree the cucumber, mint, lime juice, agave, and salt in a blender until smooth. Pour the mixture through a fine-mesh strainer, pressing with a spatula to remove as much liquid as possible.
  2. Pour the mixture into 8 4-ounce ice-pop molds, dividing evenly. Insert ice-pop sticks and freeze until firm, at least 4 hours and up to 4 days.

Recipe Source: https://www.realsimple.com/food-recipes/browse-all-recipes/cucumber-agave-mint-pops

Peaches and Cream Pops

If you have a sweet tooth, this peaches and cream popsicle recipe, made with peach nectar and brown sugar, is for you. This popsicle is so fresh and tasty, it’s like eating a peach from your local roadside famer’s stand.

Ingredients:

  • 3 cups peach nectar (100% peach juice)
  • 3/4 cup heavy cream
  • 1/4 cup brown sugar
  • 1 tablespoon grated fresh ginger
  • Pinch of salt

Directions:

  1. Whisk together the peach nectar, cream, sugar, ginger, and salt in a large bowl until smooth.
  2. Pour the mixture into 8 4-ounce ice-pop molds, dividing evenly. Insert ice-pop sticks and freeze until firm, at least 4 hours and up to 4 days.

Recipe Source: https://www.realsimple.com/food-recipes/browse-all-recipes/peaches-cream-pops

Dairy-Free Cherry Almond Pops

If you’re sensitive to dairy products, but are still looking for a creamy and delicious popsicle recipe to try, we highly recommend this dairy-free cherry almond pop recipe. This recipe, made with fresh cherries, almond milk, and lemon juice, is packed full of bright and tangy flavors.

Ingredients:

  • 2 cups pitted cherries (fresh or frozen)
  • 2 1/2 cups almond milk
  • 1/4 cup sugar
  • 2 tablespoons fresh lemon juice
  • 1/4 teaspoon almond extract
  • Pinch of salt

Directions:

  1. Puree the cherries, almond milk, sugar, lemon juice, almond extract, and salt in a blender until smooth.
  2. Pour the mixture into 8 4-ounce ice-pop molds, dividing evenly. Insert ice-pop sticks and freeze until firm, at least 4 hours and up to 4 days.

Recipe Source: https://www.realsimple.com/food-recipes/browse-all-recipes/dairy-free-cherry-almond-pops

 Grape, Green Apple, Kale Pops

If you love tart and sour treats, this grape, green apple, and kale pop is perfect for you. The best part…the flavors of the grapes and green apples are so powerful you won’t even notice you’re getting a serving of antioxidant-rich kale in your dessert.

Ingredients:

  • 2 cups white grape juice
  • 2 cups seedless green grapes
  • 2 cups stemmed kale
  • 2 ripe bananas
  • 1 green apple, chopped
  • Pinch of salt

Directions:

  1. Puree the grape juice, grapes, kale, bananas, apple, and salt in a blender until smooth.
  2. Pour the mixture through a fine-mesh strainer, pressing with a spatula to remove as much liquid as possible.
  3. Pour the mixture into 8 4-ounce ice-pop molds, dividing evenly. Insert ice-pop sticks and freeze until firm, at least 4 hours and up to 4 days.

Recipe Source: https://www.realsimple.com/food-recipes/browse-all-recipes/grape-green-apple-kale-pops

If you’re interested in adding additional healthy treat recipes to your recipe box, we suggest that you check out the Positive Health Wellness website.  This website contains tons of delicious recipes and gives great advice on how to live a healthier lifestyle.

 Do you have a favorite homemade popsicle recipe?

Share it with us in the comments below!

3 Delicious Picnic Recipes for a Great Memorial Day Picnic

Every Memorial Day, we celebrate the courageous men and women who have died serving our country. If you’re a retired or active member of any of our armed forces, we thank you for your service!

On this special holiday, many people get their friends and families together and host a delicious picnic or BBQ. And while traditional burgers, potato salad, and watermelon slices are always good picnic staples, we thought you might like a few new ideas for your picnic menu this year.

If you’re hosting—or attending—a Memorial Day picnic, we recommend adding the following recipes to your menu to mix things up. We hope you love them!

Crisp Cucumber Salad

If you’re attending a picnic feast, chances are someone is already bringing your standard potato or green leaf salad. In an effort to not double up on the same menu item, we recommend giving this recipe for a crisp cucumber salad a try.

Not only is this a unique salad option, but it’s a cool and refreshing menu option for a hot day.

Ingredients:

  • 2 cucumbers, thinly sliced
  • 4 scallions, thinly sliced
  • 1/2 small red bell pepper, chopped
  • 1/4 cup sour cream
  • 3 tablespoons white vinegar
  • 3 tablespoons sugar
  • 1 1/4 teaspoons salt
  • 1/4 teaspoon black pepper

Directions:

1. In a medium bowl, combine cucumbers, scallions, and red pepper.

2. In a small bowl, combine remaining ingredients; pour over cucumber mixture.

3. Cover and chill at least 2 hours before tossing and serving.

Recipe Source: https://www.mrfood.com/Deli-Salad/Crisp-Cucumber-Salad

Shrimp Burgers

A burger is a classic summertime picnic staple. Yet, as tasty as they are, you’re bound to get bored of the traditional ground beef burger—especially if you cook out a lot or are attending more than one picnic over the weekend.

This year, impress your seafood-loving friends with a new twist on a classic menu item and make them a shrimp burger.

Ingredients:

  • 1 pound peeled and deveined medium shrimp
  • 1/3 cup panko breadcrumbs
  • 1 tablespoon lemon juice
  • 1/2 teaspoon kosher salt
  • 1/4 teaspoon garlic powder
  • 1/4 teaspoon freshly ground black pepper
  • 2 scallions, white and green parts, thinly sliced
  • 1 large egg, lightly beaten
  • 1/4 cup canola oil

Old Bay Mayo Ingredients:

  • 1/2 cup mayonnaise
  • 1 tablespoon Old Bay seasoning

Directions:

1. Coarsely chop half of the shrimp.

2. Put the remaining shrimp in a food processor and pulse until smooth. Then, combine both shrimp in a large bowl with the breadcrumbs, lemon juice, salt, garlic powder, pepper, scallions, and egg, and mix.

3. Refrigerate for 10 minutes, and then form into 4 patties. Refrigerate 10 more minutes.

4. Heat the oil in a large cast-iron skillet over medium-high heat. Cook the burgers, about 3 minutes per side.

5. Make the mayo by combining the mayonnaise and Old Bay to taste in a small bowl.

Recipe Source: http://www.foodnetwork.com/recipes/katie-lee/shrimp-burgers-with-old-bay-mayo

Lime Margarita Bars

No picnic is complete without a tasty dessert.

These lime margarita bars are sweet, tangy, and salty and will be sure to please any palate. And don’t worry, despite the name, there is absolutely no alcohol in this dessert so they are 100% kid friendly!

Ingredients:

  • 1 1/2 cups finely crushed pretzels
  • 1/4 cup sugar
  • 3/4 cup (1-1/2 sticks) butter, melted
  • 2 (14-ounce) cans sweetened condensed milk
  • 3 eggs, lightly beaten
  • 1/2 cup fresh lime juice
  • 4 teaspoons grated lime peel

Directions:

1. Preheat oven to 350 degrees F. Coat a 9 x 13-inch baking dish with cooking spray.

2. In a medium bowl, combine pretzels, sugar, and butter. Press firmly into bottom of prepared baking dish.

3. Bake 8 to 10 minutes, or until crust is firm; remove from oven and cool slightly, leaving oven on.

4. Meanwhile, in a large bowl, combine remaining ingredients. Pour into cooled crust.

5. Bake 25 to 30 additional minutes, or until center is firm. Cool completely on a wire rack. Cut into bars and serve, or refrigerate until ready to serve.

Recipe source: https://www.mrfood.com/Bar-Cookies/Lime-Margarita-Bars-1550

What’s your favorite picnic recipe? Share it in the comments below!

3 Decadent Dessert Recipes for a Treat Yourself Day

Every day people go to work, run a business, care of their children, take care of their pets, volunteer, and do many other tiring jobs.

It’s possible you do at least one, or even more, of the things we just mentioned above.

The bottom line is that we know you work hard every day to make ends meet, care for your family, and help those in need. And most of the time, you probably even do it without getting one “thank-you” in return.

Well, we believe it’s time to thank yourself. And one of the best ways to do that is to set aside a time to indulge in a decadent “treat yourself” dessert.

We, at The Center for Natural Breast Reconstruction, love to indulge in a sweet treat from time to time ourselves. So, we thought we’d share 3 delicious recipes that we think you’ll enjoy.

Ready for a much-needed treat yourself day? Give one of the following recipes a try!

Chocolate Lava Cake Recipe

There’s nothing more decadent than a warm, gooey piece of cake filled with rich, molten chocolate lava. If you’re a chocolate lover, this recipe is for you.

The best part, it’s super simple to make. Check it out…

Ingredients:

  • Baking spray, for spraying custard cups
  • 1 stick butter
  • 2 ounces bittersweet chocolate
  • 2 ounces semisweet chocolate
  • 1 1/4 cups powdered sugar
  • 2 whole eggs
  • 3 egg yolks
  • 1 teaspoon vanilla
  • 1/2 cup all-purpose flour
  • Vanilla ice cream, for serving

Directions:

1. Preheat the oven to 425 degrees F. Spray four custard cups with baking spray and place on a baking sheet.

2. Microwave the butter, bittersweet chocolate and semisweet chocolate in a large bowl on high until the butter is melted, about 1 minute. Whisk until the chocolate is also melted. Stir in the sugar until well blended. Whisk in the eggs and egg yolks, then add the vanilla. Stir in the flour. Divide the mixture among the custard cups.

3. Bake until the sides are firm and the centers are soft, about 13 minutes. Let stand 1 minute. Invert on individual plates while warm and serve with vanilla ice cream.

Recipe Source: http://www.foodnetwork.com/recipes/chocolate-lava-cakes

Strawberry Shortcake Recipe

If you prefer a dessert made from fresh, sweet, and juicy berries, you’re going to want to give this strawberry shortcake recipe a try.

This light, yet decadent dessert, topped with a sweet homemade whipped cream, is so easy to make even a novice chef can do it. Give it a try.

Ingredients:

  • 3 pints fresh strawberries
  • 1/2 cup white sugar
  • 2 1/4 cups all-purpose flour
  • 4 teaspoons baking powder
  • 2 tablespoons white sugar
  • 1/4 teaspoon salt
  • 1/3 cup shortening
  • 1 egg
  • 2/3 cup milk
  • 2 cups whipped heavy cream

Directions:

1. Slice the strawberries and toss them with 1/2 cup of white sugar. Set aside.

2. Preheat oven to 425 degrees F (220 degrees C). Grease and flour one 8-inch round cake pan.

3. In a medium bowl combine the flour, baking powder, 2 tablespoons white sugar and the salt. With a pastry blender, cut in the shortening until the mixture resembles coarse crumbs. Make a well in the center and add the beaten egg and milk. Stir until just combined.

4. Spread the batter into the prepared pan. Bake at 425 degrees F (220 degrees C) for 15 to 20 minutes or until golden brown. Let cool partially in pan on wire rack.

5. Slice partially cooled cake in half, making two layers. Place half of the strawberries on one layer and top with the other layer. Top with remaining strawberries and cover with the whipped cream.

Recipe Source: http://allrecipes.com/recipe/8201/strawberry-shortcake/

Vanilla Bean Mousse Recipe

Vanilla lovers, rejoice!

This 4-ingredient recipe is simple and delicious, and leaves you wanting to come back for seconds. And we say, go ahead and grab that extra serving—today is a day to indulge, right? The next time you have a vanilla craving, whip this recipe up…

Ingredients:

  • One vanilla bean, seeds scraped from the pod
  • 2/3 cup sugar
  • 2 egg whites
  • 1 cup heavy cream

Directions:

1. Whip heavy cream with vanilla bean seeds and 1/3 cup sugar until soft peaks form (err on the side of slightly overwhipped). Set aside.

2. In a medium mixing bowl, beat egg whites until foamy. Add 1/3 cup sugar and beat until stiff peaks form.

3. Fold together the whipped cream mixture and the egg mixture (I folded the eggs into the whipped cream).

4. Gently pour into individual serving dishes and refrigerate at least six hours, or overnight.

5. Serve!

Recipe Source: http://www.sugarlaws.com/vanilla-bean-mousse

Do you have a favorite decadent dessert recipe? Share it with us in the comments below!


Delicious and Nutritious Plants for Your Spring Vegetable Garden

Spring has officially sprung, and it’s time to start planting your spring garden, packed with delicious and nutritious veggies. Yum!

If you’ve never planted a vegetable garden before, or are looking for some new ideas for your existing garden, you’ve come to the right place. Today, we’re going to share some of our favorite veggies that thrive in gardens during the cooler spring months.

Even better, we’re going to share some delicious recipes you can use once your veggies are mature and ready to harvest.

Keep reading to discover the best types of veggies to plant this time of year and a variety of different recipes you can use to make these nutritious veggies taste great!

Lettuce

From iceberg to romaine, spring is the prime season for growing lettuce. In fact, it’s the best time you should have this leafy vegetable in your garden.

That’s because as soon as the weather gets hot, lettuce wilts and dies. So, start planting now!

We recommend growing romaine lettuce in your garden. The darker-colored lettuce varieties tend to have more vitamins and nutrients, like manganese, potassium, biotin, vitamin B1, copper, iron, and vitamin C, and are a very good source of dietary fiber.

Once you’ve harvested your lettuce, try out this delicious lettuce wrap recipe!

Chicken Lettuce Wraps

Ingredients:

  • 1-1/2 pounds boneless skinless chicken breasts, cubed
  • 1 tablespoon plus 1-1/2 teaspoons peanut oil, divided
  • 3/4 cup chopped fresh mushrooms
  • 1 can (8 ounces) water chestnuts, drained and diced
  • 1 tablespoon minced fresh gingerroot
  • 2 tablespoons rice vinegar
  • 2 tablespoons reduced-sodium teriyaki sauce
  • 1 tablespoon reduced-sodium soy sauce
  • 1/2 teaspoon garlic powder
  • 1/4 teaspoon crushed red pepper flakes
  • 1-1/2 cups shredded carrots
  • 1/2 cup julienned green onions
  • 12 Bibb or Boston lettuce leaves
  • 1/3 cup sliced almonds, toasted

Directions:

#1. In a large nonstick skillet coated with cooking spray, cook chicken in 1 tablespoon oil for 3 minutes; drain. Add the mushrooms, water chestnuts and ginger; cook 4-6 minutes longer or until chicken is no longer pink. Drain and set aside.

#2. In a small bowl, whisk the vinegar, teriyaki sauce, soy sauce, garlic powder, red pepper flakes and remaining oil. Stir in the carrots, onions and chicken mixture.

#3. Spoon onto lettuce leaves; sprinkle with almonds. If desired, fold sides of lettuce over filling and roll up. Yield: 6 servings.

Recipe source: http://www.tasteofhome.com/recipes/chicken-lettuce-wraps 

Broccoli  

Broccoli is another hardy cool weather veggie, which makes it perfect for springtime planting.

The best part—it’s a very low maintenance plant to grow. As long as you plant it in an area with full access to sunlight and water it every day, you’ll have beautiful broccoli stalks shooting up in your garden before you know it.

Tip: Broccoli does not like hot weather. For this reason, we advise you to pick up partially grown stalks from your local plant nursery so it has time to mature before summer hits.

Once harvested, each stalk is packed with dietary fiber, vitamin B6, vitamin E, manganese, phosphorus, vitamin B1, vitamin A, potassium, and copper. All of these nutrients are vital for a healthy body.

When your broccoli is ready to eat, we recommend trying out this broccoli salad recipe.

Broccoli Salad

Ingredients:

  • 1 teaspoon salt
  • 5-6 cups fresh broccoli florets (about 1 pound of florets)
  • 1/2 cup toasted slivered almonds
  • 1/2 cup cooked, crumbled bacon
  • 1/4 cup of red onion, chopped
  • 1 cup of frozen peas, thawed (or fresh peas if you can get them)
  • 1 cup mayonnaise
  • 2 tablespoons apple cider vinegar
  • 1/4 cup honey

Directions:

#1. Bring a large pot of water, salted with a teaspoon of salt, to a boil. Add the broccoli florets. Cook 1-2 minutes, depending on how crunchy you want the broccoli. 1 minute will turn the broccoli bright green, and leave it still pretty crunchy. 2 minutes will cook the broccoli through, but still firm.

#2. Drain the broccoli and immediately put into a bowl of ice water to stop the cooking. After the broccoli cools, drain it well before dressing it in the next step.

#3. Combine broccoli florets, almonds, crumbled bacon, chopped onion, and peas in a large serving bowl. In a separate bowl, whisk together mayonnaise, cider vinegar and honey.

#4. Add dressing to the salad and toss to mix well. Chill thoroughly before serving.

Recipe Source: http://www.simplyrecipes.com/recipes/broccoli_salad/

Asparagus

Asparagus is a delicious and hardy spring vegetable. The only downside—this type of produce tends to be expensive when you buy it from a grocery store.

The solution: Grow your own at home and save big!

Because asparagus is typically grown from asparagus crowns that you buy at your local garden store, this veggie is pretty easy to grow. It’s also low maintenance, which makes it the perfect vegetable for those who are new to gardening.

On top of being easy to grow, it’s also very nutritious. It’s a very good source of fiber, folate, vitamins A, C, E and K. It also contains chromium, a trace mineral that enhances the ability of insulin to transport glucose from the bloodstream into cells.

Pretty neat!

Personally, my favorite way to consume asparagus is by cooking it on the grill.

Simply coat the asparagus stalks in a little bit of olive oil, then lightly salt and pepper.

Throw the stacks directly on the grill, or use a grill pan, and cook for about 10-15 minutes. The longer you cook the stalks, the softer they will become.

Super easy and delicious!

Tip: You can add whatever seasoning you like to asparagus. Experiment with different seasoning combinations until you find the flavoring you like best!

Do you have a favorite spring vegetable?

Let us know in the comments below!

Give Yourself the Gift of Health This New Year


With the holidays behind us, it’s time to get excited and look forward to the new year ahead of us. Before we officially close out the season of giving, there is one more gift we want to talk about.

And that gift is the gift of health.

We believe that taking care of your body and being aware of your health are the keys to living a happy and healthy life. There’s no better time than right now to put yourself on the path to health and happiness as we begin a new year.

It doesn’t matter how good or poor your health currently is. There are many small lifestyle changes you can make to help ensure you’re giving your body the things it needs while also getting the medical care you need to stay happy and healthy.

The new year means starting fresh. We hope you’ll take advantage of this time to put in place a plan for the year that promotes your health and happiness.

Not sure where to start? No worries, we have a few suggestions!

Keep reading to discover a few things you can do to give yourself the gift of health this year.

Eat Healthy

Your health begins with what you put in your body.

Of course, there’s nothing wrong with indulging in a tasty treat every once in a while. But it’s also important to ensure that you are getting the nutrients from fresh meats (if you’re not a vegetarian), vegetables, and fruits.

Here are a few of our favorite recipes you can add to your weekly meal plan.

Go for Regular Physicals

Visiting your doctor for a yearly exam is a great way to make sure you’re in tip-top shape.
Most important, your doctor might be able to detect health problems before you notice them. And that’s important because early detection is the key to saving lives, especially for cancer patients.

You can’t go wrong with a yearly exam to make sure you’re in good health.

Get Exercise

Exercise is an important part of staying healthy. It helps you build muscles, burn excess fat, and keep your heart strong.

If you’re someone who feels as if you can’t exercise, don’t worry. It’s ok to start slow. Something as simple as a walk around the block is a great place to get started.

Check out some of our favorite ways to get into an exercise routine.

Perform At-Home Breast Exams

Ladies, this one is super important!

As we mentioned before, early detection saves lives. Which is why at-home breast exams are so important, even if you don’t have a family history of breast cancer.

BreastCancer.org gives a great overview on how to do an at-home breast exam. Check it out here.

Your doctor can also teach you how to do a self-exam. Ask your doctor to show you at your next appointment.

Take Note of Changes in Your Body

Nobody knows your body better than you do.

If you notice any changes—including lumps, spots, marks, bumps, rashes, or even less visible changes like unusual headaches or pains—be sure to report those changes to your doctor.

Your doctor can diagnose any health concerns and put you on the path to health and happiness.

What do you do to live a healthy life? Share with us below!

Delicious Pumpkin Spice Recipes for Fall


Fall is right around the corner, and that means one thing…it’s also officially pumpkin spice season! (One of our favorite things about fall here at The Center for Natural Breast Reconstruction.)

It’s the season many of us have been waiting for all year, and we can’t wait to indulge in our favorite pumpkin spice cookie, pie, and latte recipes!

And there is no better time than now to whip out some of our favorite delicious pumpkin spice recipes.

The best part is that many of our favorite pumpkin spice recipes actually contain pumpkin, a very healthy and nutritious food.

So healthy, in fact, that pumpkin is well known for the following health benefits:

  • Pumpkin is loaded with vitamin A, a vitamin essential to keep your eyes healthy.
  • Pumpkin is packed with fiber, which is good for heart health.
  • Pumpkin is full of antioxidants, which make it an anti-inflammatory food.

That being said, please understand that eating copious amounts of pumpkin will in no way give you all the nutrients you need to live a healthy life.

However, the many health benefits that pumpkins do have surely make us feel less guilty as we consume our favorite pumpkin spice treats!

Keep reading to discover some of our favorite pumpkin spice recipes.

Whole Grain Pumpkin Spice Waffles

Ingredients:

  • 2¼ cups (200 grams) oat flour
  • 1 tablespoon baking powder
  • ¾ teaspoon salt
  • 1 teaspoon cinnamon
  • ½ teaspoon ginger
  • ¼ teaspoon nutmeg
  • ¼ teaspoon allspice or cloves
  • 3 large eggs
  • Scant 2/3 cup milk of choice (I used plain, unsweetened almond milk)
  • Scant ½ cup melted coconut oil or 7½ tablespoons butter, melted
  • ½ cup (122 grams) packed pumpkin puree
  • 3 tablespoons maple syrup
  • 1 tablespoon vanilla extract

Directions:

#1 In a large mixing bowl, combine the oat flour, baking powder, salt, cinnamon, ginger, nutmeg and all spice or cloves. Whisk to combine.

#2 In a medium mixing bowl, whisk the eggs. Then add the milk, coconut oil or butter, pumpkin purée, maple syrup and vanilla extract. Whisk until the mixture is thoroughly blended.

#3 Pour the liquid mixture into the oat flour mixture. Stir with a big spoon until just combined (the batter will still be a little lumpy). Let the batter rest for 10 minutes so the oat flour has time to soak up some of the moisture. Plug in your waffle iron to preheat now.

#4 Once 10 minutes is up, give the batter one more, gentle swirl with your spoon. The batter will be pretty thick, but don’t worry! Your waffles will turn out great. Pour batter onto the heated waffle iron, enough to cover the center and most of the central surface area, and close the lid.

#5 Once the waffle is deeply golden and crisp, transfer it to a cooling rack or baking sheet. Don’t stack your waffles on top of each other or they’ll lose crispness. If desired, keep your waffles warm by placing them in a 200-degree oven until you’re ready to serve. Repeat with remaining batter and serve with desired toppings on the side.

Recipe Source: http://cookieandkate.com/2014/gluten-free-pumpkin-spice-waffles/

Pumpkin Chai Latte

Ingredients:

  • Latte
  • 1 tea bag of spiced chai (or decaf spiced chai rooibos)
  • ½ cup plain, unsweetened almond milk or milk of choice
  • 2 tablespoons real pumpkin purée
  • 1 tablespoon real maple syrup or honey
  • ¼ teaspoon vanilla extract
  • ⅛ teaspoon cinnamon
  • ⅛ teaspoon ground ginger
  • Dash nutmeg
  • Dash cloves
  • Tiny dash salt
  • ½ teaspoon arrowroot starch or cornstarch (optional, makes the latte super creamy)
  • Optional garnishes: 1 cinnamon stick or star of anise, coconut whipped cream
  • Optional coconut whipped cream
  • 1 can (14 ounces) full fat coconut milk, chilled at least 10 hours (the coconut milk MUST be full fat and MUST be refrigerated for at least 10 hours. Put a mixing bowl in the freezer to chill while you’re at it.)
  • 1 tablespoon maple syrup
  • ½ teaspoon vanilla extract
  • ⅛ teaspoon cinnamon

Directions:

#1 In a small saucepan, bring ½ cup water to a gentle boil. Remove the water from heat, add the tea bag, and let it steep for 4 minutes. Before removing the tea bag, squeeze any water remaining out by pressing the tea bag against the side of the pan with the back of a spoon.

#2 Add the almond milk, pumpkin purée, maple syrup, vanilla, cinnamon, ginger, nutmeg, cloves and salt to the pan. Whisk in the optional arrowroot starch or cornstarch. Pour the mixture into a stand blender and blend for a minute or two, until the components are blended together and the drink is nice and creamy. (You can alternatively use an immersion blender, but I had much better results with my stand blender.)

#3 Pour the mixture back into your pan and gently rewarm on the stove, then pour it into a mug. Top with totally optional whipped coconut cream and/or garnish with totally optional cinnamon stick or star of anise.

#4 To make the coconut whipped cream: Pull out the chilled can of coconut milk and mixing bowl. Open the can of coconut milk and scoop the solid coconut cream into the chilled bowl (you can use the remaining coconut water in smoothies). Using an electric hand mixer, beat the cream until fluffy and smooth. Add the maple syrup, vanilla extract and cinnamon and gently blend again to combine. Use the coconut cream immediately or cover and store in the fridge for later (it will be soft at room temperature and more firm when cold).

Recipe Source: http://cookieandkate.com/2014/homemade-pumpkin-chai-latte/

 Pumpkin Spice Ice Cream

Ingredients:

  • 15 ounces (1 and 1/2 cups) pumpkin
  • 1 (13.5 ounce) can coconut milk
  • 1 (13.5 ounce) can light coconut milk
  • 1/3 cup honey, agave, or maple syrup
  • 1/4 cup molasses
  • 1 teaspoon vanilla
  • 1/2 teaspoon cinnamon
  • 1/8 teaspoon allspice
  • Pinch of ground ginger
  • Pinch of nutmeg
  • Pinch of salt

Directions:

#1 Combine all the ingredients in a large bowl, whisking well to break up any lumps of pumpkin.

#2 Chill in the refrigerator until cold, then whisk again.

#3 Store the ice cream in an airtight container in the freezer, and let it soften at room temperature for about 15 minutes before scooping.

Recipe Source: http://acalculatedwhisk.com/pumpkin-spice-ice-cream-vegan-paleo/

 What is your favorite pumpkin spice recipe? Comment below!

Detox Water: 3 Recipes to Cleanse Your Body

water with lemon and cucumber
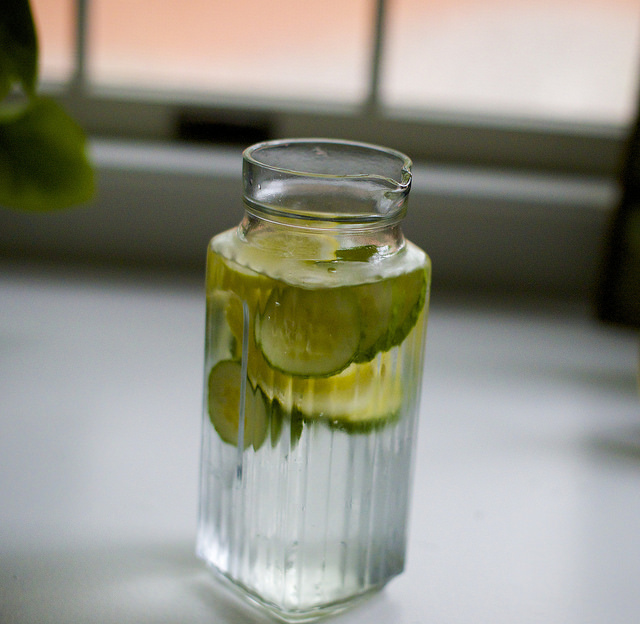
Detox water. It’s all the rage.

But is this new fad healthy? Absolutely! Just add it to your normal daily routine.

Detox water has a balance of fruits and herbs that flush fat, support liver and kidney health, and give your metabolism a jump-start.

Each of the ingredients in these recipes contain natural health benefits—and most you can find already in your kitchen!

Mix up a big pitcher of these 3 water detoxes or pour into a water bottle if you’re on the go.

Pre-Bathing Suit Season Detox


Ingredients:

  • ½ gallon spring water
  • ½ grapefruit, sliced
  • ½ cucumber, sliced
  • 2-3 mint leaves
  • ½ lemon, sliced
  • ½ lime, sliced

Why it’s good for you: The cucumbers serve as a natural diuretic, and help your body release water you’ve been retaining. The enzymes in grapefruits help you burn fat more easily. In addition, the lemons and limes help your digestive system. This detox will flatten your belly and have you bathing suit ready in no time!

Lemon Ginger Detox

Ingredients:

  • 1 12-ounce glass water, at room temperature
  • Juice of 1/2 lemon
  • 1/2 inch knob of zested ginger root

Why it’s good for you: The properties of zested ginger act as a detoxifier that help give your metabolism a jump-start. Lemons serve as a diuretic and improve digestive health to release toxins. Having a glass of lemon ginger water is a great drink for first thing in the morning to get your metabolism moving.

Fat Flush Detox

Ingredients:

-1 gallon of water

-Chopped-up watermelon in squares (about 3 slices)

-1 whole sliced cucumber

-1 lemon and/or lime

-Fresh mint leaves (about 10-13)

Why it’s good for you: The mint leaves are not only refreshing, but they also help cleanse the liver and relieve stomach cramping. Watermelon and cucumbers help filter your kidneys and liver. Lemons help to regulate your digestive track and break down fat. This is a great after-weekend detox to get your body back in tip-top shape.

Have a favorite detox recipe? Share on our Facebook page!

Charleston Holiday Heirloom Recipes

This month we’ve been highlighting everything we love about our beloved Charleston. We would be remiss not to include the manybenne wafers heirloom holiday recipes we hold dear this time of year.

You won’t find a cranberry sauce recipe or an average sugar cookie on this list. We are covering our favorite holiday recipes-Charleston style.

1. She Crab Soup– Often called Charleston’s signature dish, She Crab soup is an evolution of Scottish seafood bisque. A rich-in-flavor recipe that melds succulent blue crab meat with a hearty cream soup that is finished with a dash of dry sherry, the dish dates to the early 1700s and was famously served to President Taft (1909 – 13) during his visit to Charleston. Synonymous with special occasions, She Crab soup often appears on local’s Christmas Day dinner menus.

2. The Benne WaferIn our last blog, we mentioned how these yummy treats make the perfect unique gift. They are a delicious example of plantation era ingenuity, a recipe born of a few basic ingredients-butter, brown sugar, flour, and toasted sesame seeds. Said to invoke good luck, Benne wafers pack a crunch and make a popular holiday party host gift!

3. Historic St. Cecilia Punch-Formal balls, a revered social ritual in the Lowcountry, traditionally take place at Christmastime, when the plantation aristocracy historically arrived in town for debutante season. The custom of presenting a signature punch dates back to the 1700s. Vintage cocktails are in vogue, so why not offer a centuries-old libation to your guests this holiday season?

4. Eggnog, Peppermint Bars, Santa Mice CookiesThe Bakehouseonly uses wholesome ingredients to create delectable preservative-free treats. Peppermint takes center stage during the holidays when the bakery pulls out its favorite Christmastime recipes to produce seasonal sweets. The Santa Mice cookies are always a hit!

5. Shrimp and Grits– You didn’t think we’d forget this did you?! Shrimp and Grits is a quintessential Lowcountry recipe. Originally served as a hardy breakfast during the plantation era, contemporary interpretations of the dish are popular for both brunch and supper—and especially during festive holiday gatherings.

Do you have a favorite Charleston Heirloom Holiday Recipe? Please share it on our Facebook page!