Archives for 2017

5 Ways to Get Organized and Reduce Stress This Holiday Season

It’s the most wonderful time of the year!

…Unless you easily get bogged down by the chaos that ensues during this incredibly busy holiday season.

We know the feeling of stress and overwhelm that can come along with attending holiday parties, shopping, making travel plans, and everything else that pops up during the holidays.

And these feelings can easily steal the joy out of what’s supposed to be a fun, exciting time of year with family and friends.

But, here’s the good news…we’ve also discovered the secret to not going crazy during this time of year…and it all has to do with organization!

The sooner you are able to get your ducks in a row, the more you’ll be able to enjoy the holidays. So, today, we’ve decided to share how to easily get organized for the holiday season.

Check out some of our favorite organization strategies…

#1. Use a calendar to clearly plan out all your events, vacations, etc.

The best way to get organized is to pull out a calendar. After all, there’s nothing worse than having to run out at midnight to grab cupcakes because you forgot about your kid’s school holiday party or accidentally double-booked your Saturday night plans because you have more than one holiday event to attend.

Whew, talk about stressful!

This year, hang a calendar in a common room for everyone to see. Mark the days you have plans so you can stay on top of what’s coming next on your schedule.

While you’re at it, don’t forget to schedule a few “relax days” when you do absolutely nothing. We promise, you’re going to need them! 

#2. Make travel plans early so you don’t have to stress about them.

Waiting last minute to do anything in regards to traveling can be a pain. For instance, when you don’t plan ahead, you might find yourself…

  • Paying more for travel expenses.
  • Settling for cheap hotels because everything else is booked up.
  • Having to endure long, stressful car rides because plane or train tickets are all sold out.

Don’t wait to reserve your hotel room until the night before you arrive in town. If you know you’ll be traveling for the holidays, get your plans together ASAP.

As each week goes by and we get closer to the end of December, it’s going to be harder and more expensive to book all your travel plans.

#3. Declutter your home.

The holiday season is also a gift giving season. And while there’s nothing wrong with spoiling your kids with a few new toys or accepting gifts from friends and family, the amount of stuff that accumulates in your home can easily become overwhelming.

This year, get organized by weeding through your stuff and getting rid of what is not needed. Or better yet, put together some gently used clothes, pieces of furniture you don’t use, or other household items, and donate them to those who are in need.

To keep your home from filling back up with stuff, ask friends and family who feel the need to give you a gift to send a donation to a charity of your choosing.

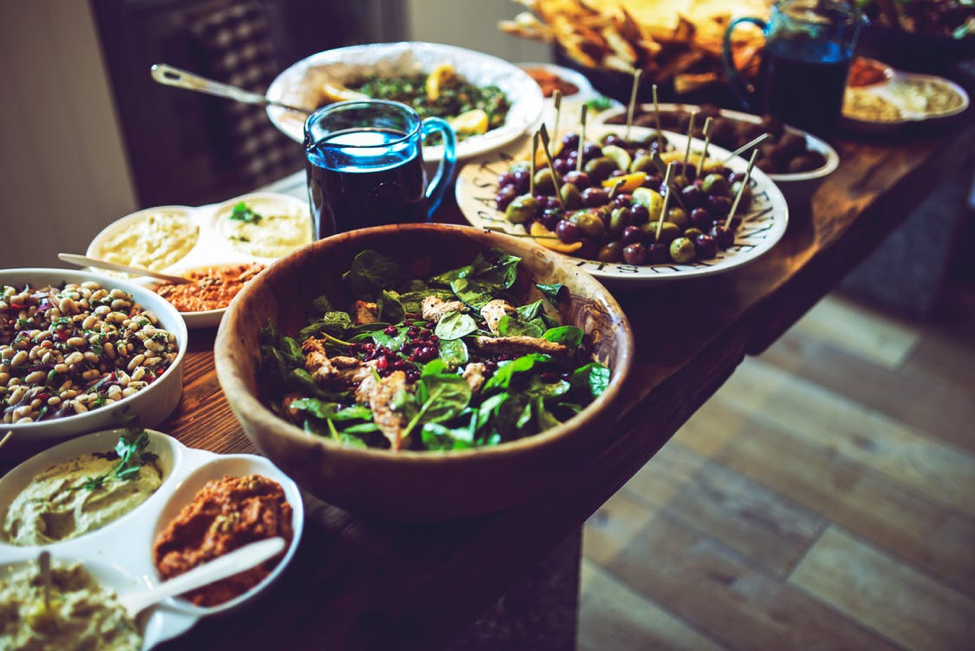
#4. Purchase staple holiday foods/baking supplies in advance.

Nothing says the holidays quite like a tray of freshly baked Christmas cookies or a turkey cooking in the oven.

Having to run out to the store to buy eggs every time you get inspired to make some cookies certainly takes the joy out of baking!

This year, put together a list of the foods and desserts you want to make…and do your shopping ahead of time. This way, you can stock up on the materials you’ll need to cook and bake.

If you’re hosting a turkey dinner, buy your turkey early and keep it in your freezer. Planning on making several batches of cookies? Buy lots of butter and then freeze it. You get the idea!

The best part…frozen items, canned goods, and a lot of baking supplies (flour, salt vanilla extract, etc.) will keep for months! If you don’t use all your supplies for the holidays, keep them on hand, and you can use it throughout the year.

#5. Be realistic about your holiday commitments.

Last but not least, we encourage you to be realistic about your holiday commitments.

It might seem like a good idea to say yes to everything at the time, but several weeks later when you’re running from a party to a holiday parade to dinner at your Aunt Barbara’s house, you’re probably going to regret it.

Organize your time wisely. Don’t schedule too many activities for one day. And be okay with saying no to the things you don’t want to do.

How do you stay organized during the holidays? Let us know in the comments below!

The Center for Natural Breast Reconstruction Gives Thanks

On behalf of The Center for Natural Breast Reconstruction, we wish you and your family a very Happy Thanksgiving.

We hope you are able to spend time this week with the ones you love, eating delicious food and reflecting on the many things you are grateful for!

Over the last few weeks, we’ve spent some time thinking about the things that we are truly grateful for. And in honor of this holiday of giving thanks, we wanted to share our list with you.

How many things do we have in common on our lists? Keep reading to find out…

#1 — The opportunity to work with so many courageous women who have battled breast cancer.

First and foremost, we are so thankful that we get to work with such amazing women each and every day. Their stories inspire us, their smiles brighten our day, and it is truly a gift to be able to interact with each and every one of the ladies we work with.

Read the stories from some amazing women here.

#2 — Our team of highly skilled staff and medical professionals.

We never take for granted the amazing staff and medical professionals that we have on our team. We are thankful that we have kind, hardworking, and highly skilled professionals that are able to give our clients the best care they deserve.

#3 — Our health.

Every day we work with women who have fought courageous battles against cancer. And every time we hear a new patient’s story, we are reminded of how lucky we are to have our health.

#4 — Our friends and family.

From loving spouses and children to awesome coworkers and friends, we are thankful to be surrounded by those who love us each day.

#5 — Our freedoms.

We are thankful for all the freedoms we have. From access to the technology and education we need to serve our patients to being able to pursue our passion to help women recover and heal from breast cancer, we are truly blessed.

#6 — Delicious food.

Last, but certainly not least, we are thankful for the delicious Thanksgiving meal we will be indulging in this week. There’s nothing better than chowing down on our Thanksgiving favorites while surrounded by the people we love.

Need some inspiration of what to bring to your Thanksgiving table this year? Here are some of our favorite holiday recipes!

This year, when you’re gathered around your Thanksgiving dinner table, we encourage you to share the things you’re grateful for with your loved ones.

Once again, Happy Thanksgiving from our family to yours! We hope you have a wonderful holiday!

What are you thankful for? Let us know in the comments below!

Ask the Doctor- I’ve Completed Radiation. When Is The Right Time To Make A Consultation Appointment To See If I Can Have DIEP Flap Reconstruction?

This week, James E. Craigie MD, of The Center for Natural Breast Reconstruction answers your question about breast reconstruction.

Question: I had a right mastectomy December 8, 2016, and radiation ended March 2017. Currently, I’m having problems with fluid buildup because the skin cells haven’t healed enough to absorb bodily fluids. When should I set an appointment to see if I can have the DIEP flap reconstruction?

Answer: Thank you for your question. No need to wait for a consult. I could see you anytime. Usually, we wait 3 months after completion of radiation before start DIEP breast reconstruction. Every situation is different. If it is convenient to come for a consult I could evaluate your progress and readiness to proceed. Just let me know if you would like my office to contact you about an appointment.
Thanks again!

Have a question about breast reconstruction or post-surgical you’d like answered from our surgical team? Just ask!

3 Unique Thanksgiving Side Dish Recipes

When invited to someone’s home for Thanksgiving dinner, it’s common courtesy to bring a side dish to share with everyone.

Sounds easy. That is until you’ve waited until the last minute and you scramble, trying to figure out what to bring.

Aunt Betty always brings sweet potatoes. Grandma Doris is sure to bring her famous green bean casserole. And your good friends from down the street already volunteered to bring dinner rolls.

It doesn’t seem like there’s much left to choose from.

Until now…because we are going to recommend 3 unique and delicious Thanksgiving side dishes that are sure to wow everyone at the dinner table. Check out the recipes below…


Butternut Squash Soup Recipe

Soup might not be the first thing you think of when it comes to Thanksgiving dinner, but this gourd-based menu item certainly deserves a spot on the menu. Not only does it make a great side dish, it’s also a wonderful main dish option in case you have any vegetarian friends attending the celebration.

Here’s the recipe…

Ingredients:

  • 1 large butternut squash (about 3 pounds), halved vertically and seeded
  • 1 tablespoon olive oil, plus more for drizzling
  • ½ cup chopped shallot (about 1 large shallot bulb)
  • 1 teaspoon salt
  • 4 garlic cloves, pressed or minced
  • 1 teaspoon maple syrup
  • ⅛ teaspoon ground nutmeg
  • Freshly ground black pepper, to taste
  • Up to 4 cups (32 ounces) vegetable broth
  • 1 to 2 tablespoons butter, to taste (substitute olive oil for dairy-free/vegan soup)

Directions:

  1. Preheat the oven to 425 degrees Fahrenheit and line a rimmed baking sheet with parchment paper. Place the butternut squash on the pan and drizzle each half with just enough olive oil to lightly coat the squash on the inside (about 1 teaspoon each). Rub the oil over the inside of the squash and sprinkle it with salt and pepper.
  2. Turn the squash face down and roast until it is tender and completely cooked through, about 45 to 50 minutes. Set the squash aside until it’s cool enough to handle, about 10 minutes. Then use a large spoon to scoop the butternut squash flesh into a bowl and discard the tough skin.
  3. Meanwhile, in a medium skillet (or large soup pot, if you’ll be serving soup from that pot), warm 1 tablespoon olive oil over medium heat until shimmering. Add the chopped shallot and 1 teaspoon salt. Cook, stirring often until the shallot has softened and is starting to turn golden on the edges, about 3 to 4 minutes. Add the garlic and cook until fragrant, about 30 seconds, stirring frequently.
  4. If you have a high-performance blender like a Vitamix, transfer the cooked shallot and garlic to your blender. Add the reserved butternut, maple syrup, nutmeg and a few twists of freshly ground black pepper. Pour in 3 cups vegetable broth, being careful not to fill the container past the maximum fill line (you can stir in any remaining broth later). Secure the lid and select the soup preset. The blender will stop running once the soup is super creamy and hot.
  5. If you would like to thin out your soup a bit more, add the remaining cup of broth (I used the full 4 cups, but if you used a small squash, you might want to leave it as is). Add 1 to 2 tablespoons butter or olive oil, to taste, and blend well. Taste and blend in more salt and pepper, if necessary.
  6. Serve immediately (I like to top each bowl with a little more black pepper). Let leftover soup cool completely before transferring it to a proper storage container and refrigerating it for up to 4 days (leftovers taste even better the next day!). Or, freeze this soup for up to 3 months.

Recipe Source: https://cookieandkate.com/2015/roasted-butternut-squash-soup/

Baked Apples with Sausage Stuffing Recipe

Stuffing is a food that’s typically only made during the holiday season. For that reason, it’s no surprise that this treat is often one of the first food items to disappear during a Thanksgiving feast. This year, bring some backup stuffing baked inside sweet, delicious apples.

Check out the recipe…

Ingredients:

  • 1 tablespoon oil or butter
  • 1 celery stalk, diced
  • ¼ cup finely diced onion
  • ½ package sausage
  • 1 box stuffing mix
  • 1 ¼ cup  chicken broth (or the same amount of water called for in the instructions for the stuffing)
  • 6-12 apples such as Granny Smith, Golden Delicious and Red Delicious

Directions:

  1. Heat the oil in a medium or large skillet over medium heat. Add the onion and the celery and cook until softened, about 2-3 minutes.
  2. Add the sausage to the skillet and cook thoroughly making sure to break it up into crumbles. Remove from heat.
  3. In a large bowl, stir together stuffing mix and sausage mixture. Add chicken broth in the same amount as water is called for in the stuffing mix instructions. Mine called for 1 1/4 cups of water so I used 1 1/4 cups of chicken broth.
  4. Stir the mixture together so that the stuffing is soft and moist. Feel free to add a little more broth if needed. Set the mix aside.
  5. Slice the very top of the apples off.
  6. Use a spoon or a melon baller to carefully scoop out the entire core of the apple.
  7. Repeat this for every apple.
  8. Spoon stuffing into the apples and place in a high-sided baking dish.
  9. Once all the apples are stuffed and in the dish, carefully pour an additional 1/4-1/2 cup of broth over the apples. Add another 1/4 cup to the bottom of the dish.
  10. Bake uncovered at 350 degrees for about 30 minutes or until the apples are softened but not falling apart. If you don’t want the stuffing to brown, cover the dish while baking.

Recipe Source: https://growingupgabel.com/baked-apples-sausage-stuffing-recipe/

Apple Pie Salsa with Cinnamon Chips Recipe

There’s no rule that says Thanksgiving side dishes have to be nutritious or healthy. If you really want to surprise your guests, while also appeasing everyone’s sweet tooth, we suggest you bring this one-of-a-kind dish–Apple Pie Salsa with Cinnamon Chips.

Here’s how it’s made…

Salsa Ingredients:

  • 4 medium Granny Smith apples, diced
  • 2 teaspoons lemon juice
  • 1 cup light brown sugar
  • 2 tablespoons butter
  • 1 teaspoon cinnamon
  • 1/4 teaspoon nutmeg
  • 1 tablespoon cornstarch
  • 2 teaspoons vanilla
  • 1/2 cup whipped cream (optional)

Cinnamon Sugar Chips Ingredients:

  • 1/4 cup sugar
  • 1 tablespoon cinnamon
  • 5 flour tortillas
  • 2 tablespoons melted butter

Directions for Salsa:

  1. In large sauté pan, combine apples, lemon juice, brown sugar, butter, cinnamon, and nutmeg.
  2. Cook over medium heat for 20 minutes, stirring occasionally. Stir in cornstarch. Cook for two minutes, stirring occasionally.
  3. Remove from heat. Stir in vanilla. Serve warm. Top with whipped cream just before serving.

Directions for the Cinnamon Sugar Chips:

  1. Preheat oven to 350 degrees.
  2. In small bowl, combine sugar and cinnamon.
  3. Brush both sides of each tortilla with melted butter. Rub cinnamon-sugar mixture onto both sides of each tortilla. Cut tortillas into wedges. Place on ungreased baking sheet.
  4. Bake for 14-16 minutes until brown and crisp. Cool on wire rack.

Recipe Source: http://frostingandasmile.com/archives/1568

What is your favorite unique Thanksgiving side dish? Let us know in the comments below!

Ask the Doctor- I’m Having Pain After My Last Latissimus Flap/Implant Reconstruction. What Can I Do Now?

This week, Richard M. Kline, Jr., MD, of The Center for Natural Breast Reconstruction answers your question about breast reconstruction.

Question: I was diagnosed with breast cancer in 2011, and had a mastectomy on my left side followed by chemo. In 2014, my mammogram began showing tumors and I would have an ultrasound every time. This caused panic attacks and I choose to have my right breast removed because the type of cancer I had was Stage 4 Aggressive. In April 2015, I had a bilateral latissimus flat and received implants. Now I am experiencing pain across my back where I was cut and my chest gets uncomfortably tight. The site of the drainage tube is swollen and doesn’t feel good. I stopped seeing my reconstruction doctor because he did things I was not informed of. I am worried because I do not know what is going on anymore. Could you please advise me as to what might be going on or what to do?

Answer: I’m sorry you are continuing to have problems, but you are not alone.

I can’t speak about your situation specifically because I haven’t examined you, but here are some thoughts in general about patients with symptoms like yours.

There is no question that many people with implants describe symptoms such as yours. Often, there is no discernible reason why they should feel discomfort, but they do. Nonetheless, many of them feel relief when the implants are removed. This does not mean that you would or should, it is just an observation.

The latissimus flap can be done with or without dividing the nerve that makes it contract. I have known some patients with latissimus flaps done without dividing the nerve to have discomfort associated with the muscle contracting. Some have experienced relief when the nerve was subsequently divided. Obviously, I don’t know if this is your situation or not.

Sometimes people have complex, persistent pain after surgery or injury which is out of all proportion to what would be expected. This can be difficult to treat but thankfully is rare.

When evaluating a patient with symptoms like yours, we usually start with a careful history and physical evaluation. Sometimes, especially if we have concerns about implant rupture, fluid collections, infection, etc., we then get an MRI and/or CT scan Following the complete evaluation, we then decide together how to proceed.

Hope this helps at least a little. I would be happy to chat with you further by phone about your specific problem or see you in person if you can come for a visit.

Have a question about breast reconstruction or post-surgical you’d like answered from our surgical team? Just ask!

10 Reasons to Be Happy Every Day

A bad day at work…cold dreary weather…cranky kids…

Sure, we all have a list of things that can easily dampen our spirits and put us in a bad mood. But, at The Center for Natural Breast Reconstruction, we always try to look for the positives in life.

In fact, we believe that the amount of “happy” we experience each day typically outweighs the “bad.”

And it’s this focus that keeps us all full of cheer, even on the days when nothing seems to go right.

To help add some joy back into your day, we’re sharing our list of 10 simple things that make us happy every day. See how many things on our list resonate with you…then make your own list!

#1 — Getting a hug from a family member/friend

There’s truly nothing better than a warm hug from a friend or family member during your day. Whether it be your child, spouse, coworker, or friend, it’s special when someone takes a moment out of their day to let you know you are loved.

#2 — Snuggling a pet

Getting snuggles from a pet is scientifically proven to make you happier. That’s right! Science has proven that cuddling with a pet increases the levels of the feel-good happy chemicals serotonin and dopamine in your brain.

# 3 — Eating dessert

For many people, having dessert is a special treat. So, when the day comes that you get to indulge with a piece of apple pie or delicious chocolate cake, you’re bound to have a smile on your face!

For some delicious dessert recipes you can make at home, check out this blog post!

#4 — Getting 5 extra minutes of sleep when you hit the snooze button

It’s a magical feeling when the stars align and you’re able to hit the snooze button and stay in your cozy bed for an extra 5 minutes…or 10 or 20! We’re not judging! Tomorrow morning, hit your snooze button…we’ve got a feeling there will be a smile on your face as you sink back into your cozy, warm blankets.

#5 — Wrapping up in your favorite blanket after a long day

After a long day of working, wrangling kids, volunteering, or simply getting chores done, it feels great to wrap up in your favorite blanket and just relax. To put an extra smile on your face, stick your favorite blanket in the dry for 15 minutes to warm it up before wrapping up in it!

#6 — Getting a card in the mail

As an adult, it’s likely that you get more bills in your mailbox than letters from family and friends. For that reason, we always have a giant smile on our face and feel really happy when we discover that the envelope we just pulled out of the mailbox is from a friend and not the utility company. Certainly, a reason to smile and be happy!

#7 — Taking your first sip of freshly brewed coffee in the morning

Taking a sip of a fresh cup of coffee in the morning is a simple pleasure, but boy, for coffee lovers, it’s also heaven. The next time you reach for your first cup of coffee in the morning, take a minute and be sure to enjoy it.

#8 — Putting your favorite sweatpants on

Ahhh…the feeling of slipping on a pair of sweatpants after a long day is certainly enough to make us smile from ear to ear. The act of putting on cozy pants signifies the ending of another crazy day and is a reminder that it’s time to relax and unwind–something we can all smile about!

#9 — Hearing your favorite song on the radio

How cool is it when you jump in the car, turn on the radio, and your favorite song starts playing? The best part…hearing your favorite song on the radio automatically calls for an in-car dance party. How can you be unhappy after a red light jam session?

#10 — Reminding yourself how lucky you truly are

There’s a lot of negative happening in the world.

From people in the hospital fighting for their lives to seeing the destruction that occurs after natural disasters like hurricane Irma, it’s so important to reflect on how lucky you truly are.

If you have your health, loved ones in your life, a roof over your head, and a meal in your stomach, there’s no reason not to be happy!

What makes you happy every day? Share your thoughts with us in the comments below!

Ask the Doctor- Can You Do Repair and Nipple Reconstruction Surgery at the Same Time on the Same Breast?

This week, Richard M. Kline, Jr., MD, of The Center for Natural Breast Reconstruction answers your question about breast reconstruction.

Question: I had hybrid DIEP reconstruction at another facility, and I am disappointed with the results. There have been many issues. For example, my breasts are different shapes and sizes, no node involvement and no microinvasion. The surgeon who did the mastectomy said the path report said the margins were not wide enough and he will need to cut additional skin out during the next surgery. The next surgery is supposed to be to reconstruct the nipple. Can you do both procedures on the same breast at the same time? Please Help!!

Answer: I’m sorry you are having to go through this.

Did you have a complete mastectomy on the left breast or a lumpectomy? If your margins were positive (unbeknownst at the time of surgery, obviously), and you had an immediate DIEP flap, that could be a little complicated to resolve, although I’m sure we could work through it. Given that your scenario is a little bit unusual, it would probably be best if we talked by phone. Please let us know what works for you.

Have a question about breast reconstruction or post-surgical you’d like answered from our surgical team? Just ask!

3 Delicious Easy-To-Make Snack Recipes for Game Time

friends watching sport celebrating goal

Football season is in full swing! And you know what that means? It’s the perfect time to invite your friends or family members over for some game day fun!

As the game day (or night) host, you already know snacks–and lots of them–are expected.

This year, instead of grabbing a bag of Doritos, knock the socks off your guests with some of our halftime favorites.

Not only are the recipes below delicious, but they are also healthy alternatives to most snacks on the grocery store shelves, and we know your friends and family members will love them!

Caprese on a Stick

Caprese on a stick is a great snack for your guests who want to enjoy a light, savory, guilt-free snack. Between the juicy tomatoes, salty mozzarella balls, and fresh basil, you can’t go wrong with this snack on a stick.

Ingredients:

  • 1 pint cherry tomatoes, halved
  • 1 (.6 ounce) package fresh basil leaves
  • 1 (16 ounce) package small fresh mozzarella balls
  • 3 tablespoons olive oil
  • salt and pepper to taste

Directions:

  1. Thread a tomato half, a small piece of basil leaf, and a mozzarella ball onto toothpicks until all ingredients are used.
  2. Drizzle the olive oil over the tomato, cheese and basil, leaving the end of the toothpick clean.
  3. Sprinkle with salt and pepper. Serve immediately.

Tip: For an extra kick, provide your guests with balsamic vinegar that they can drizzle over the caprese sticks. Yum!

Recipe Source:
http://allrecipes.com/recipe/213849/caprese-on-a-stick/?internalSource=staff%20pick&referringId=76&referringContentType=recipe%20hub


Swedish Meatballs

You’re bound to have a few meat-loving football fans at your party. And this Swedish meatball snack recipe is the perfect way to satisfy their “meat tooth.” Best of all, this recipe is easy and can be made ahead of time.

Ingredients:

  • 1 pound ground beef
  • ¼ cup panko bread crumbs
  • 1 tablespoon parsley, chopped
  • ¼ teaspoon ground allspice
  • ¼ teaspoon ground nutmeg
  • ¼ cup onion, finely chopped
  • ½ teaspoon Garlic Powder
  • ⅛ teaspoon Pepper
  • ½ teaspoon salt
  • 1 egg
  • 1 tablespoon olive oil
  • 5 tablespoons  Butter
  • 3 tablespoons  Flour
  • 2 cups beef broth
  • 1 cup heavy cream
  • 1 tablespoon Worcestershire sauce
  • 1 teaspoon. Dijon mustard
  • salt and pepper to taste

Directions:

  1. In a medium-sized bowl, combine ground beef, panko, parsley, allspice, nutmeg, onion, garlic powder, pepper, salt and egg. Mix until combined.
  2. Roll into 12 large meatballs or 20 small meatballs. In a large skillet, heat olive oil and 1 tablespoon butter. Add the meatballs and cook turning continuously until brown on each side and cooked throughout. Transfer to a plate and cover with foil.
  3. Add 4 tablespoons butter and flour to skillet and whisk until it turns brown. Slowly stir in beef broth and heavy cream. Add Worcestershire sauce and Dijon mustard and bring to a simmer until sauce starts to thicken. Salt and pepper to taste.
  4. Add the meatballs back to the skillet and simmer for another 1-2 minutes. Serve over egg noodles or rice.

Tip: You can make them ahead of time and keep them warm in a crockpot until your guests arrive.

Recipe Source: https://therecipecritic.com/2016/08/the-best-swedish-meatballs/https://therecipecritic.com/2016/08/the-best-swedish-meatballs/

Mini Caramel S’more Cups

Last but not least, we had to include something on the snack list for dessert lovers–mini caramel s’more cups! This mini dessert snack is packed with rich chocolate and sweet caramel. The best part…because they are so little, you don’t have to feel guilty about indulging in 1 or 2 or 7 of them!

Ingredients:

  • 1 pouch (1 lb. 1.5 oz.) chocolate chip cookie mix
  • ½ cup butter or margarine, softened
  • 1 egg
  • 36 round chewy caramels in milk chocolate
  • 1 cup mini marshmallows
  • ½ cup semisweet chocolate chips

Directions:

  1. Heat oven to 375°F. Spray 36 mini muffin cups with cooking spray.
  2. Make cookie dough as directed on package, using butter and egg. Shape dough into 36 (1-inch) balls. Place 1 ball into each muffin cup.
  3. Bake 8 to 9 minutes or until edges begin to brown. Remove from oven; firmly press 1 candy into center of each cookie until flush with cookie top. Top each with 3 marshmallows. Bake 2 to 4 minutes longer or until marshmallows are puffed. Cool 30 minutes. Loosen edges of cookie with small metal spatula and remove to cooling racks. Cool completely.
  4. Place chocolate chips in small resealable freezer plastic bag. Microwave on High about 1 minute or until softened. Gently squeeze bag until chocolate is smooth; cut off tiny corner of bag. Squeeze bag to drizzle chocolate over marshmallows. Let stand until hardened, about 10 minutes.

Tip: Hide some of your freshly made s’more cups so you can enjoy them later!

Recipe Source: https://www.bettycrocker.com/recipes/caramel-smore-cups/9916aa44-083c-4507-8db9-49d0a92f62f7https://www.bettycrocker.com/recipes/caramel-smore-cups/9916aa44-083c-4507-8db9-49d0a92f62f7


What’s your favorite game time snack? Let us know in the comments below!

Ask the Doctor- Are Implants Still an Option after Radiation? I Have Expanders Now that Were Placed At the Time of Mastectomy.

This week, Richard M. Kline, Jr., MD, of The Center for Natural Breast Reconstruction answers your question about breast reconstruction.

Question: I had a double mastectomy in January 2017. Expanders were placed at that time. I had radiation March-May. Postponed reconstruction until June 2018. Are implants still an option?

Answer: Implants may still be an option, but it’s going to depend on several things, probably the most important of which is how much you were expanded prior to radiation. It can be next to impossible to expand skin after it is radiated, although occasionally it seems to work. If you were expanded, and are tolerating the expanders well, then hopefully it would be straightforward to remove the expanders and place permanent implants. In addition to placing permanent implants, fat grafting can often significantly enhance the quality of your reconstruction.

If you end up not getting a reconstruction you like with implants, the good news is that none of what you have been through impacts your chances of getting a quality reconstruction with your own natural tissue. We have successfully reconstructed many, many hundreds of radiated patients with DIEP, sGAP, and other natural tissue flaps.

Hope this helps, please let us know if you would like additional information.

Have a question about breast reconstruction or post-surgical you’d like answered from our surgical team? Just ask!

How to Have the Perfect At-Home Spa Day

There is nothing more relaxing than a day at the spa.

Not to mention, it helps you rest and unwind after a long week of work, chasing your kids around the house, or whatever else it is that you do on a weekly basis.

The only problem is that going to a professional spa can cost a lot of money.

There’s certainly nothing wrong with treating yourself every once in a while, but for most people, going for a spa treatment on a weekly basis is simply out of the budget.

For that reason, we at The Center for Natural Breast Reconstruction want to share with you how to have the perfect at-home spa day.

Our at-home version is just as fun, will make you feel just as relaxed, and can be thrown together for a fraction of what a day at the actual spa would cost.

Follow these steps for a perfect at-home spa day that will leave you feeling refreshed and ready to take on the world.

Step 1: Prepare Your Favorite Beverage

Most spas will have fancy fruit-infused waters or teas available for guests to drink when they arrive for their appointment. So, to begin your at-home spa session, grab a cup of your favorite beverage—coffee, tea, juice…even wine! We don’t judge!

Step 2: Start with a Face Mask

A face mask is an inexpensive way to rejuvenate your skin and leave your face feeling fresh.

You can purchase premade masks at just about any grocery store or skin care shop for under $5. Or, if you prefer to make your own, simply mix together 1 tbs. of coconut oil with ¼ tsp. of turmeric.

This simple 2-ingredient face mask recipe is great for hydrating your skin and reducing blemishes.

Step 3: Soak Your Feet in a Footbath

From walking all over the place to being crammed in high heels, our feet take a beating every day. This is why it’s so important to give your feet a break and soak them in a footbath.

You can buy a more expensive foot bath at the store for between $60 and $100. If you’re someone who constantly has sore feet, this might be a good investment for you.

However, if you’re only planning on enjoying a good foot soak once in a blue moon, a simple bucket will work just fine. All you have to do is fill a bucket with warm water, add some Epsom salts (you can find this at the grocery store) and let your feet soak for 15-20 minutes.

If you want to get really crazy, you can also add in some essential oils. We personally love adding about 3 drops of peppermint oil into our footbaths.

Step 4: Take a Hot Bath

If more than your feet need a good soak, we recommend that you fill a tub with nice hot water and take a bath.

Be sure to dim the lights, light candles, grab your favorite book, or turn on some soothing music. It’s such a good feeling to be able to separate yourself from the hustle and bustle of everyday life and lock yourself away in a cozy warm bath for an hour or so.

If you’d like, you can add some of the Epsom salts you used in your footbath to the water. These salts are known to help ease sore muscles and help you relax. Or, if you want to do something different, use a delightful-smelling bath bomb to make your bath time a little more special.

Step 5: Finish with Polished Nails

Most ladies have a few bottles of nail polish floating around the house. But here’s the question…how often have you been able to take the time to sit down and actually use them?

Make time after your relaxing bath to end your night with a manicure or pedicure.

Put on a pair of cozy pajamas, pick your favorite nail polish color, and go to town! While your nails are drying, indulge in some senseless TV, read a magazine, or play a game on your phone. It’s all about giving yourself the time to do what makes you happy.

Do you have any at-home spa rituals you love? Share them with us in the comments below!